Networking
Ports
To expose your application internally (to other applications) or externally, you need to define the ports on which the application listens. An application can have multiple exposed ports, each configured with the following parameters:
- Port Name: Assign a meaningful name to the port for identification.
- Port Number: Specify the port number you plan to expose. The port number should be between 0 and 65536 (inclusive).
- Public: Enable this option if you want to expose the application to the internet through a load balancer, making it accessible via a URL.
At least one public port must be exposed for an application that has a domain configured.
- Health: It's recommended, though not mandatory, to designate a health port per container. Kubernetes will check this port for liveness and readiness, and automatically restart the container if a failure is detected.
The default path for the health check is the root - /.
Domain
To expose an application publicly on the internet, you need to configure a domain through which it can be accessed. Kapstan will automatically provision a load balancer in your cloud provider's account (e.g., AWS ALB for AWS environments, GCP ALB for GCP environments, Azure AG for Azure environments).
Follow these steps to configure a domain:
- Domain Name: Add the domain on which you want your application to be publicly accessible.
- Load Balancer: If you have multiple applications with public domains, Kapstan allows you to either create a new load balancer or group multiple applications behind the same load balancer.
- Application Protocol: Select the protocol (e.g., HTTP, HTTPS) used by the container's port.
The application protocol specifies the communication method between the load balancer and the container.
Setting Up a Custom Domain
- Log in to your DNS provider and navigate to your DNS record settings.
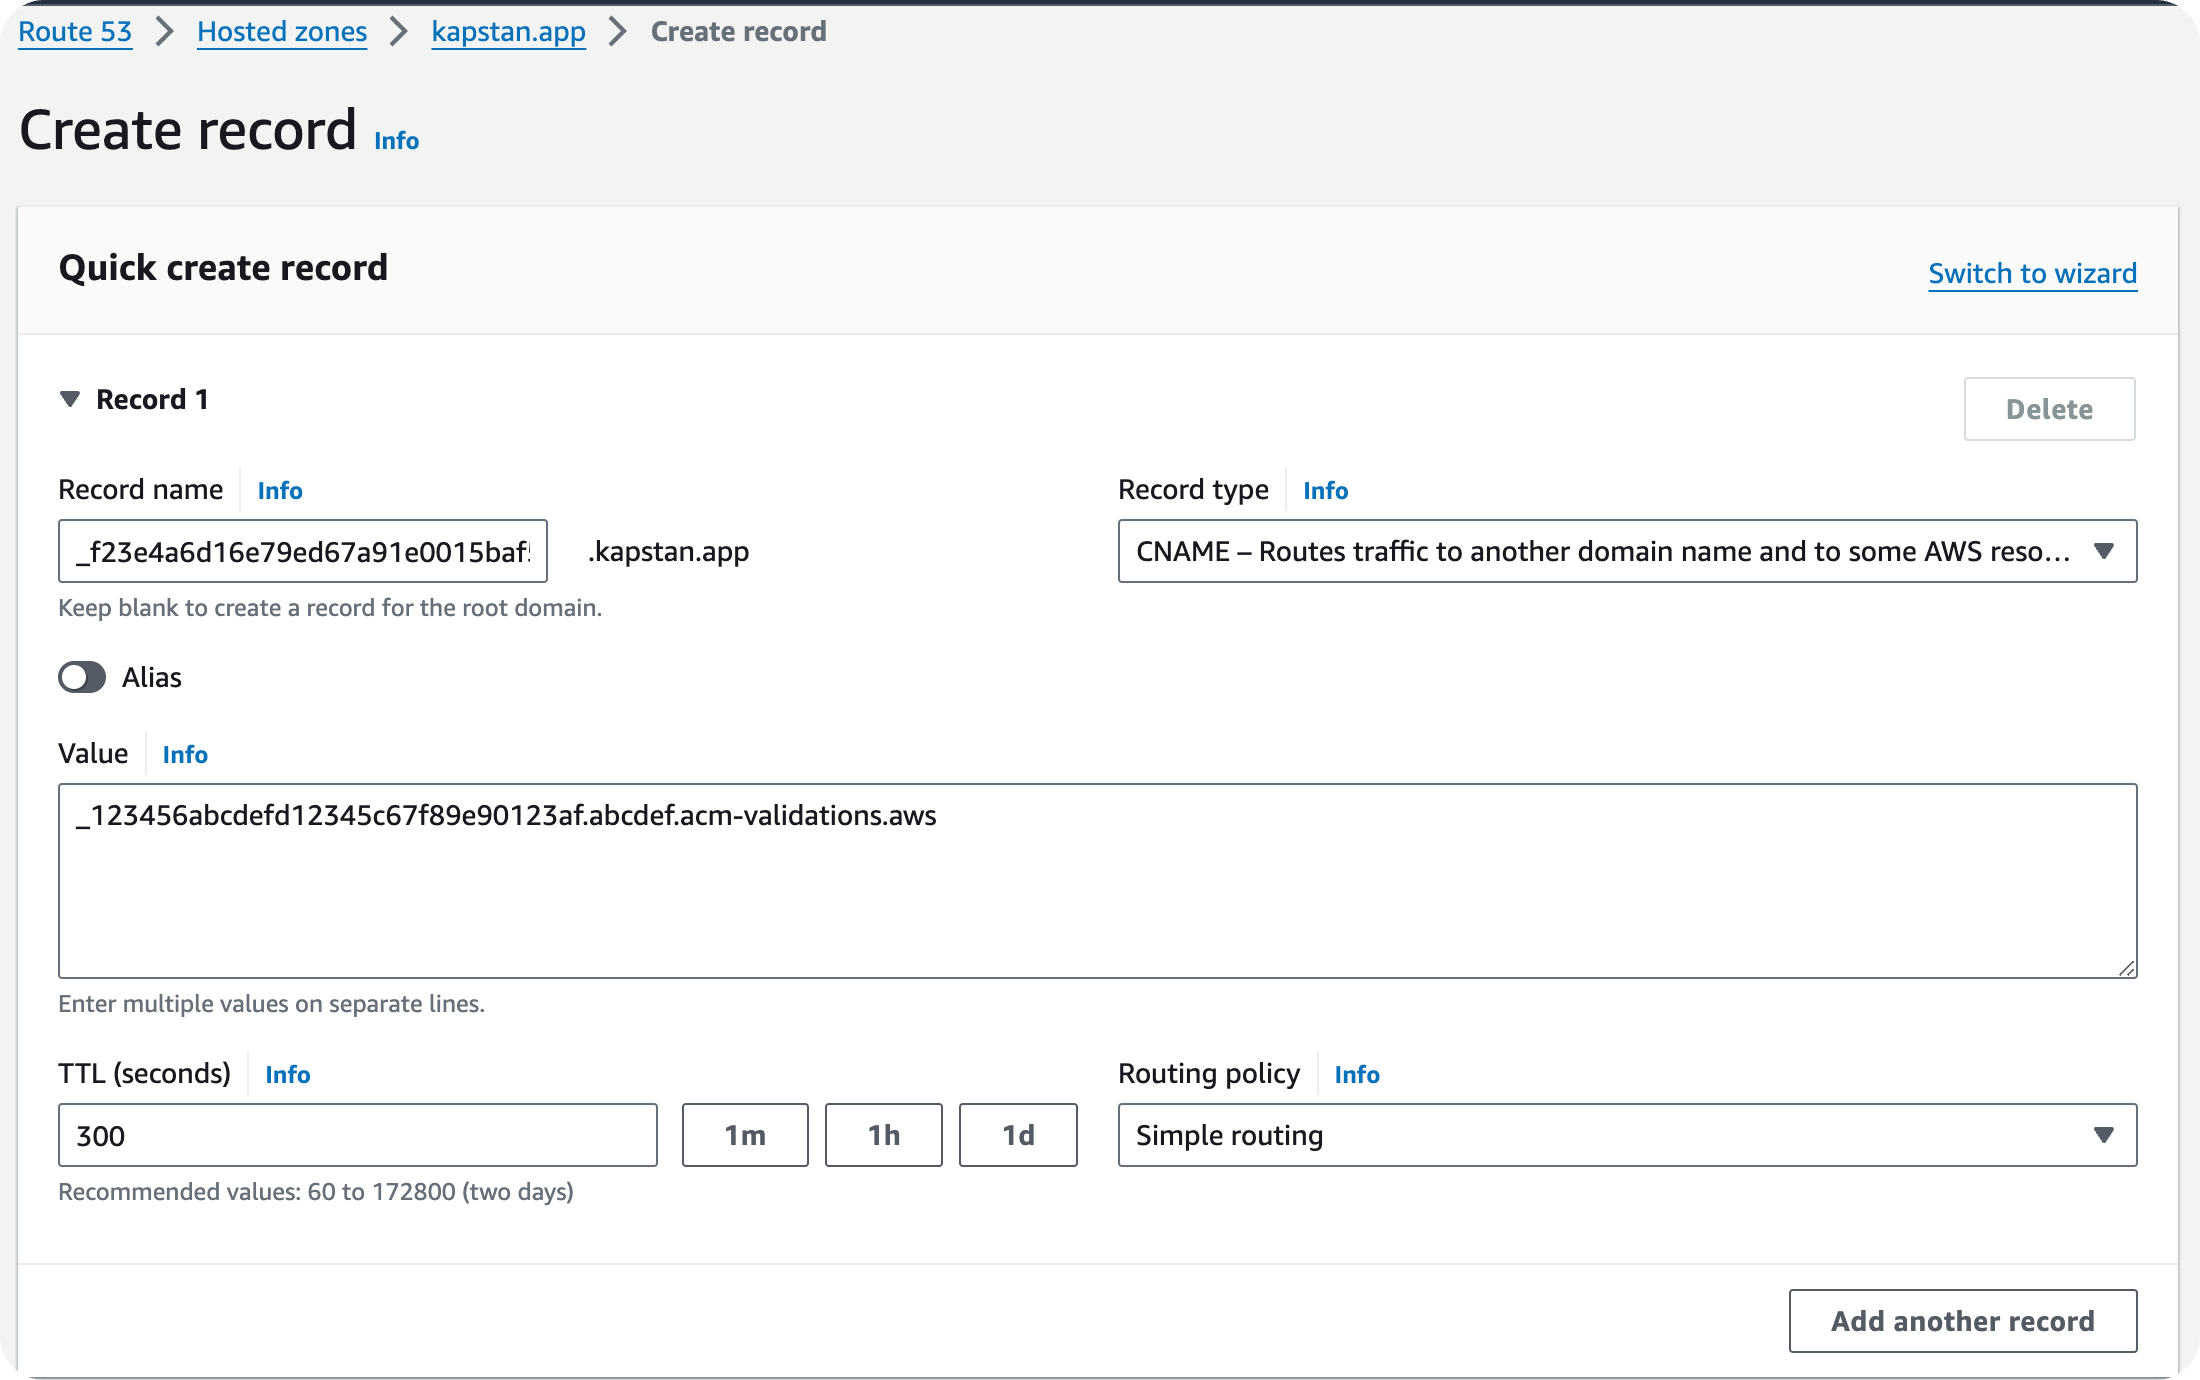
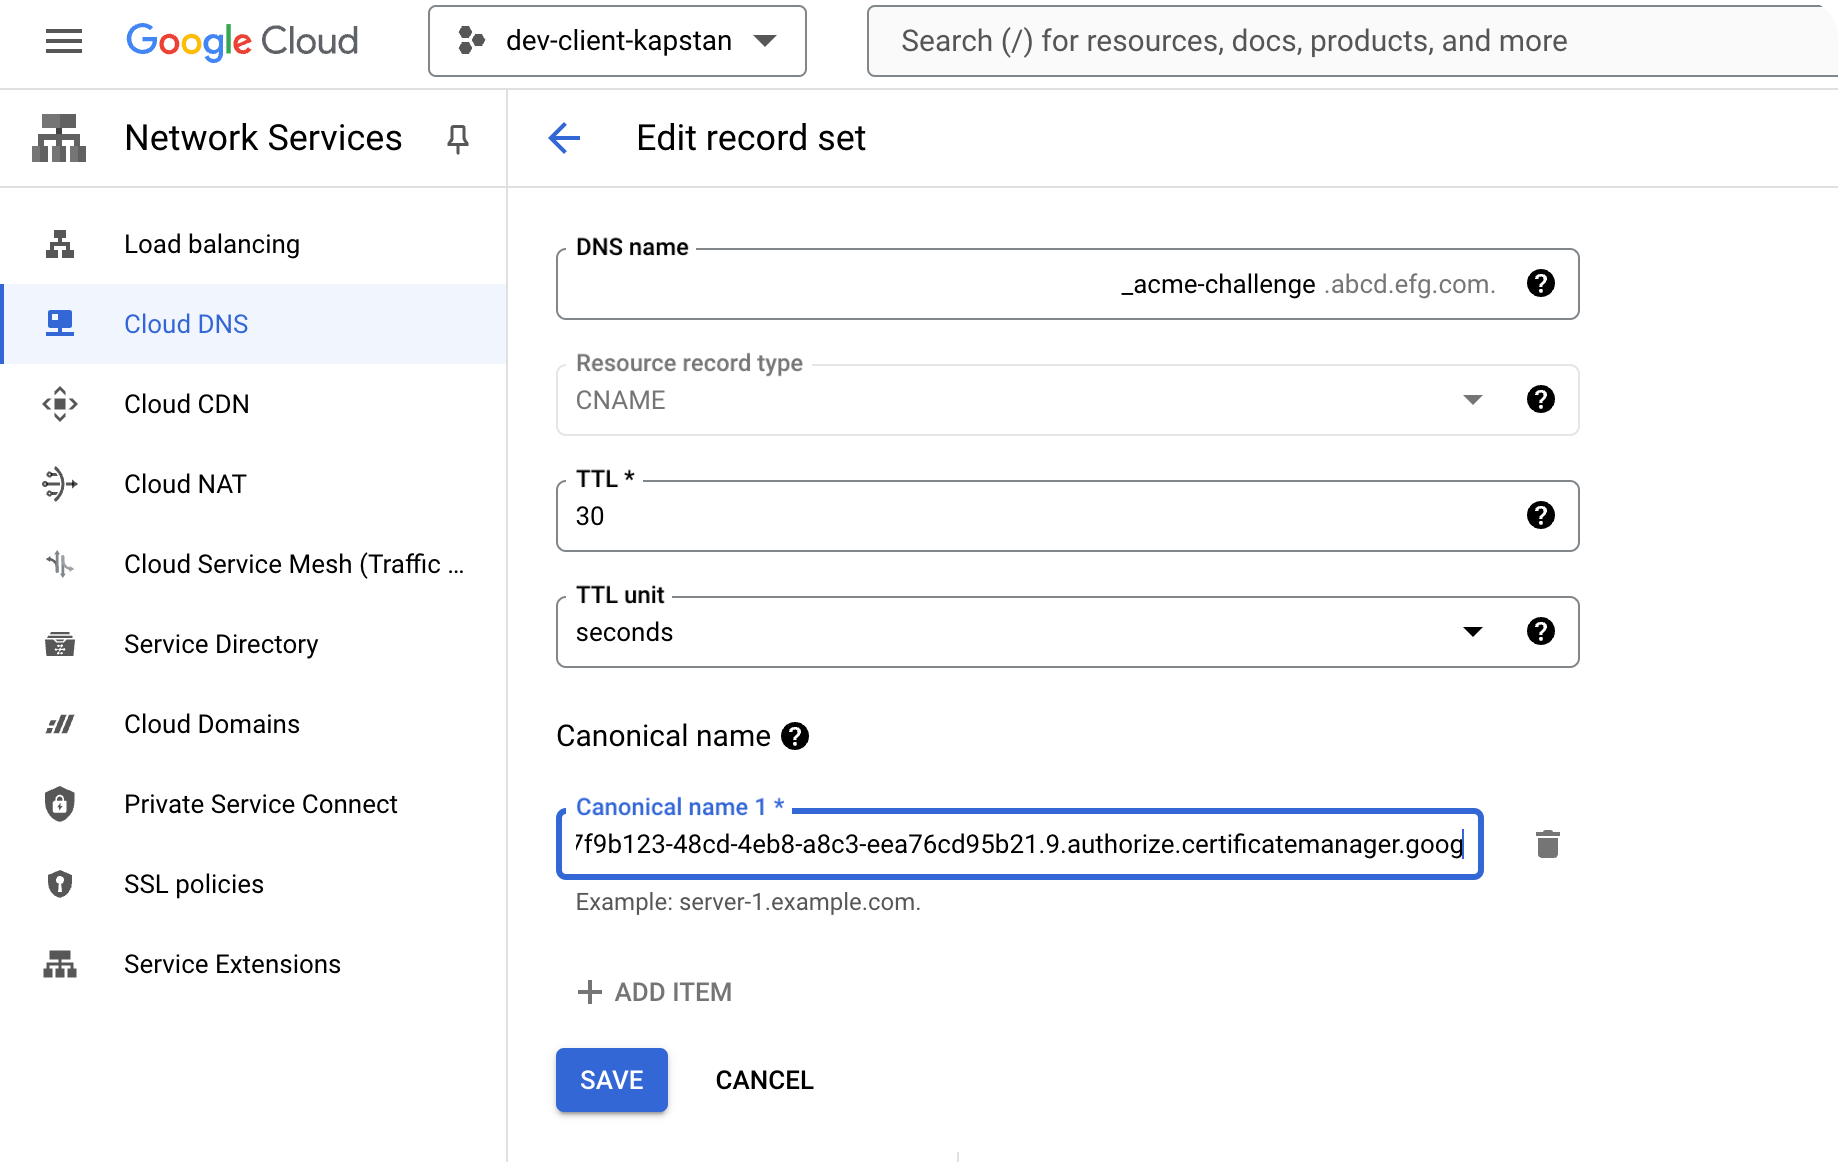
- Once the Domain's Certificate is created, enter the following DNS entry as a CNAME record in your DNS provider to validate the certificate:
- Record Name: Certificate validation FQDN
- Record Value: Certificate validation value
AWS
- Certificate validation may take up to 30 minutes. Please allow some time for the process to complete.
- Deploy your application after the Domain's status changes to
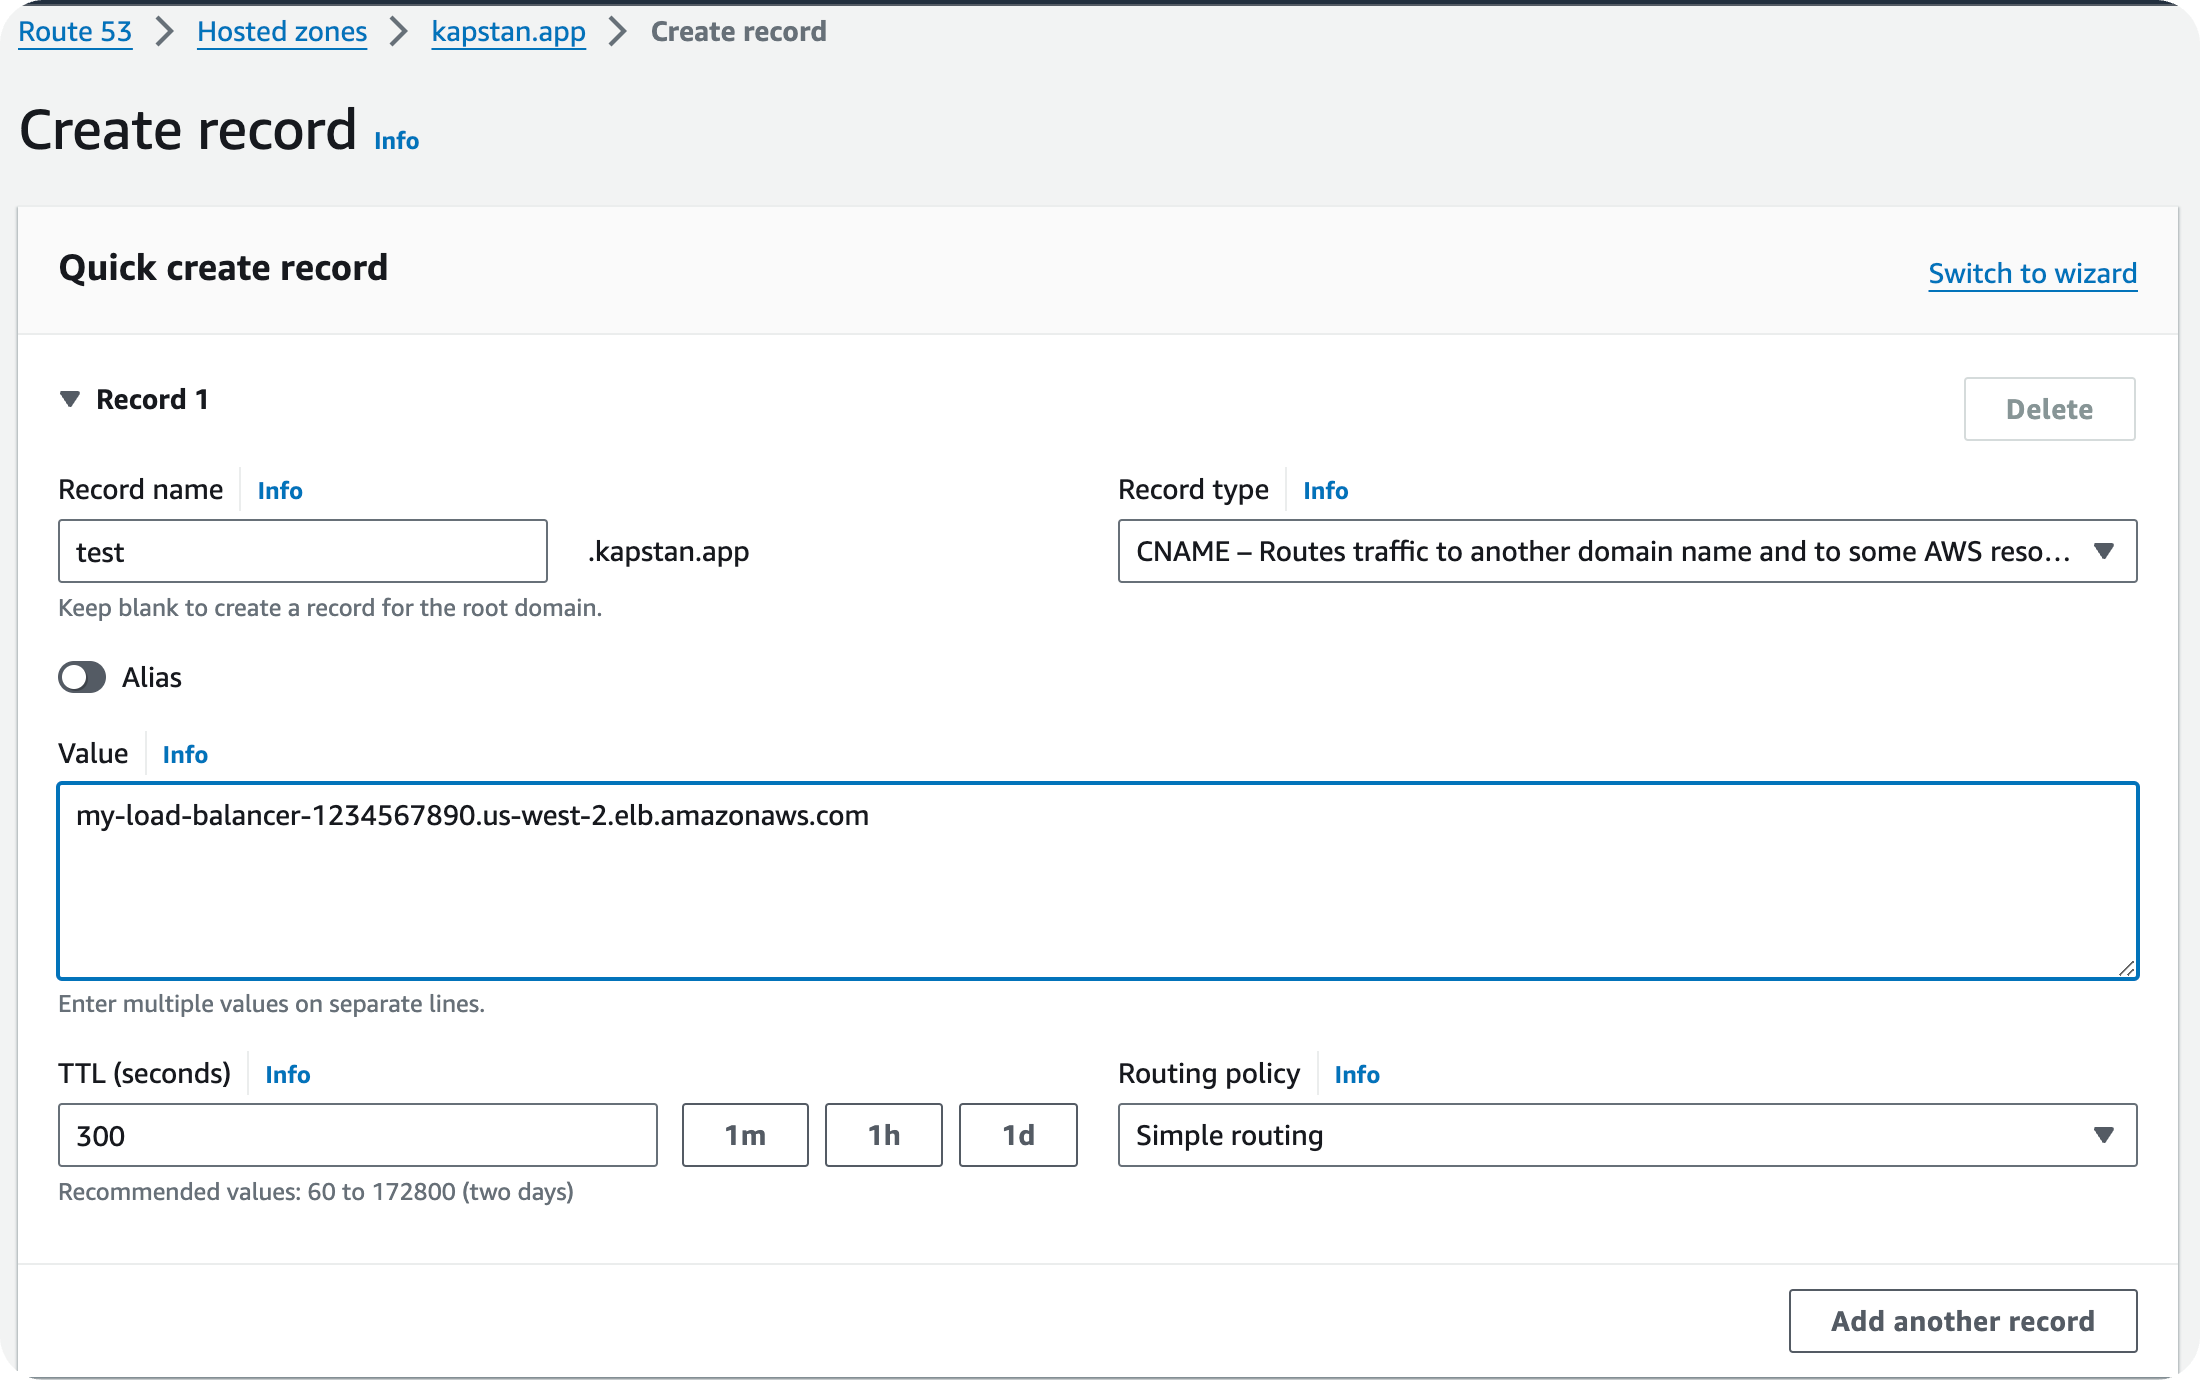
Configured. Once deployed, the load balancer URL will be available under theDomaindetails in theNetworkingtab. - Update the DNS entry as a CNAME Record to map the domain to the load balancer URL:
- Record Name: Domain
- Record Value: Load balancer URL
- The domain should be accessible a few minutes after the DNS update and certificate validation.
GCP
- Deploy your application. Once deployed, you will find the load balancer IP in the
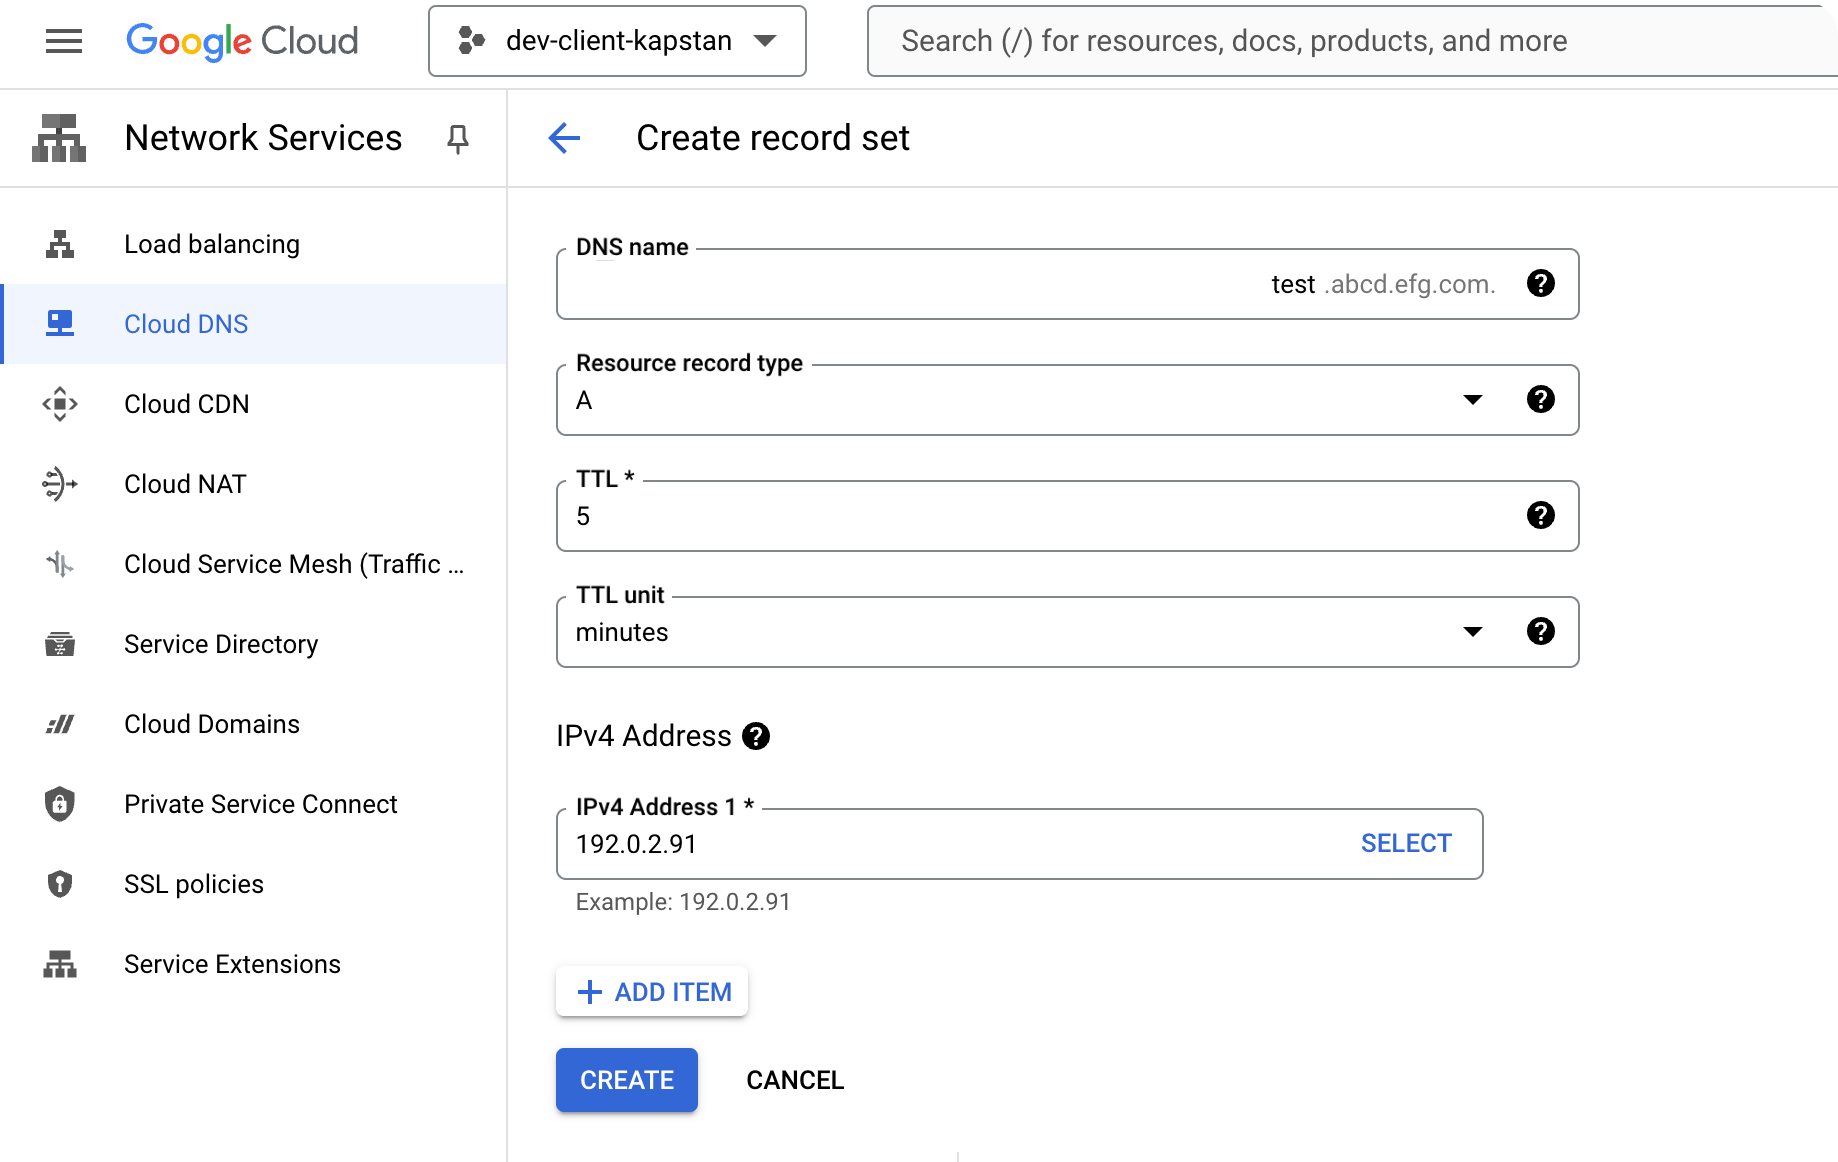
Domaindetails under theNetworkingtab. - Update the DNS entry as an A Record to map the domain to the load balancer IP:
- Record Name: Domain
- Record Value: Load balancer IP
- After deployment, GCP certificate validation can take up to 60 minutes to complete. After successful validation, you should be able to access your application.
Azure
- Deploy your application. Once deployed, you will find the load balancer endpoint in the
Domaindetails under theNetworkingtab. - Update the DNS entry as an A Record to map the domain to the load balancer endpoint:
- Record Name: Domain
- Record Value: Load balancer endpoint
- After deployment, the certificate validation can take up to 30 minutes to complete. After successful validation, you should be able to access your application.
Updating DNS Records
Here are examples of updating DNS records for DNS managers such AWS Route 53 and GCP Cloud DNS.
AWS Route 53
-
Certificate Validation Entry
-
Domain-Load Balancer Mapping as CNAME Record
GCP Cloud DNS
-
Certificate Validation Entry
-
Domain-Load Balancer Mapping as A Record
Azure DNS Management
- Domain-Load Balancer Mapping as A Record
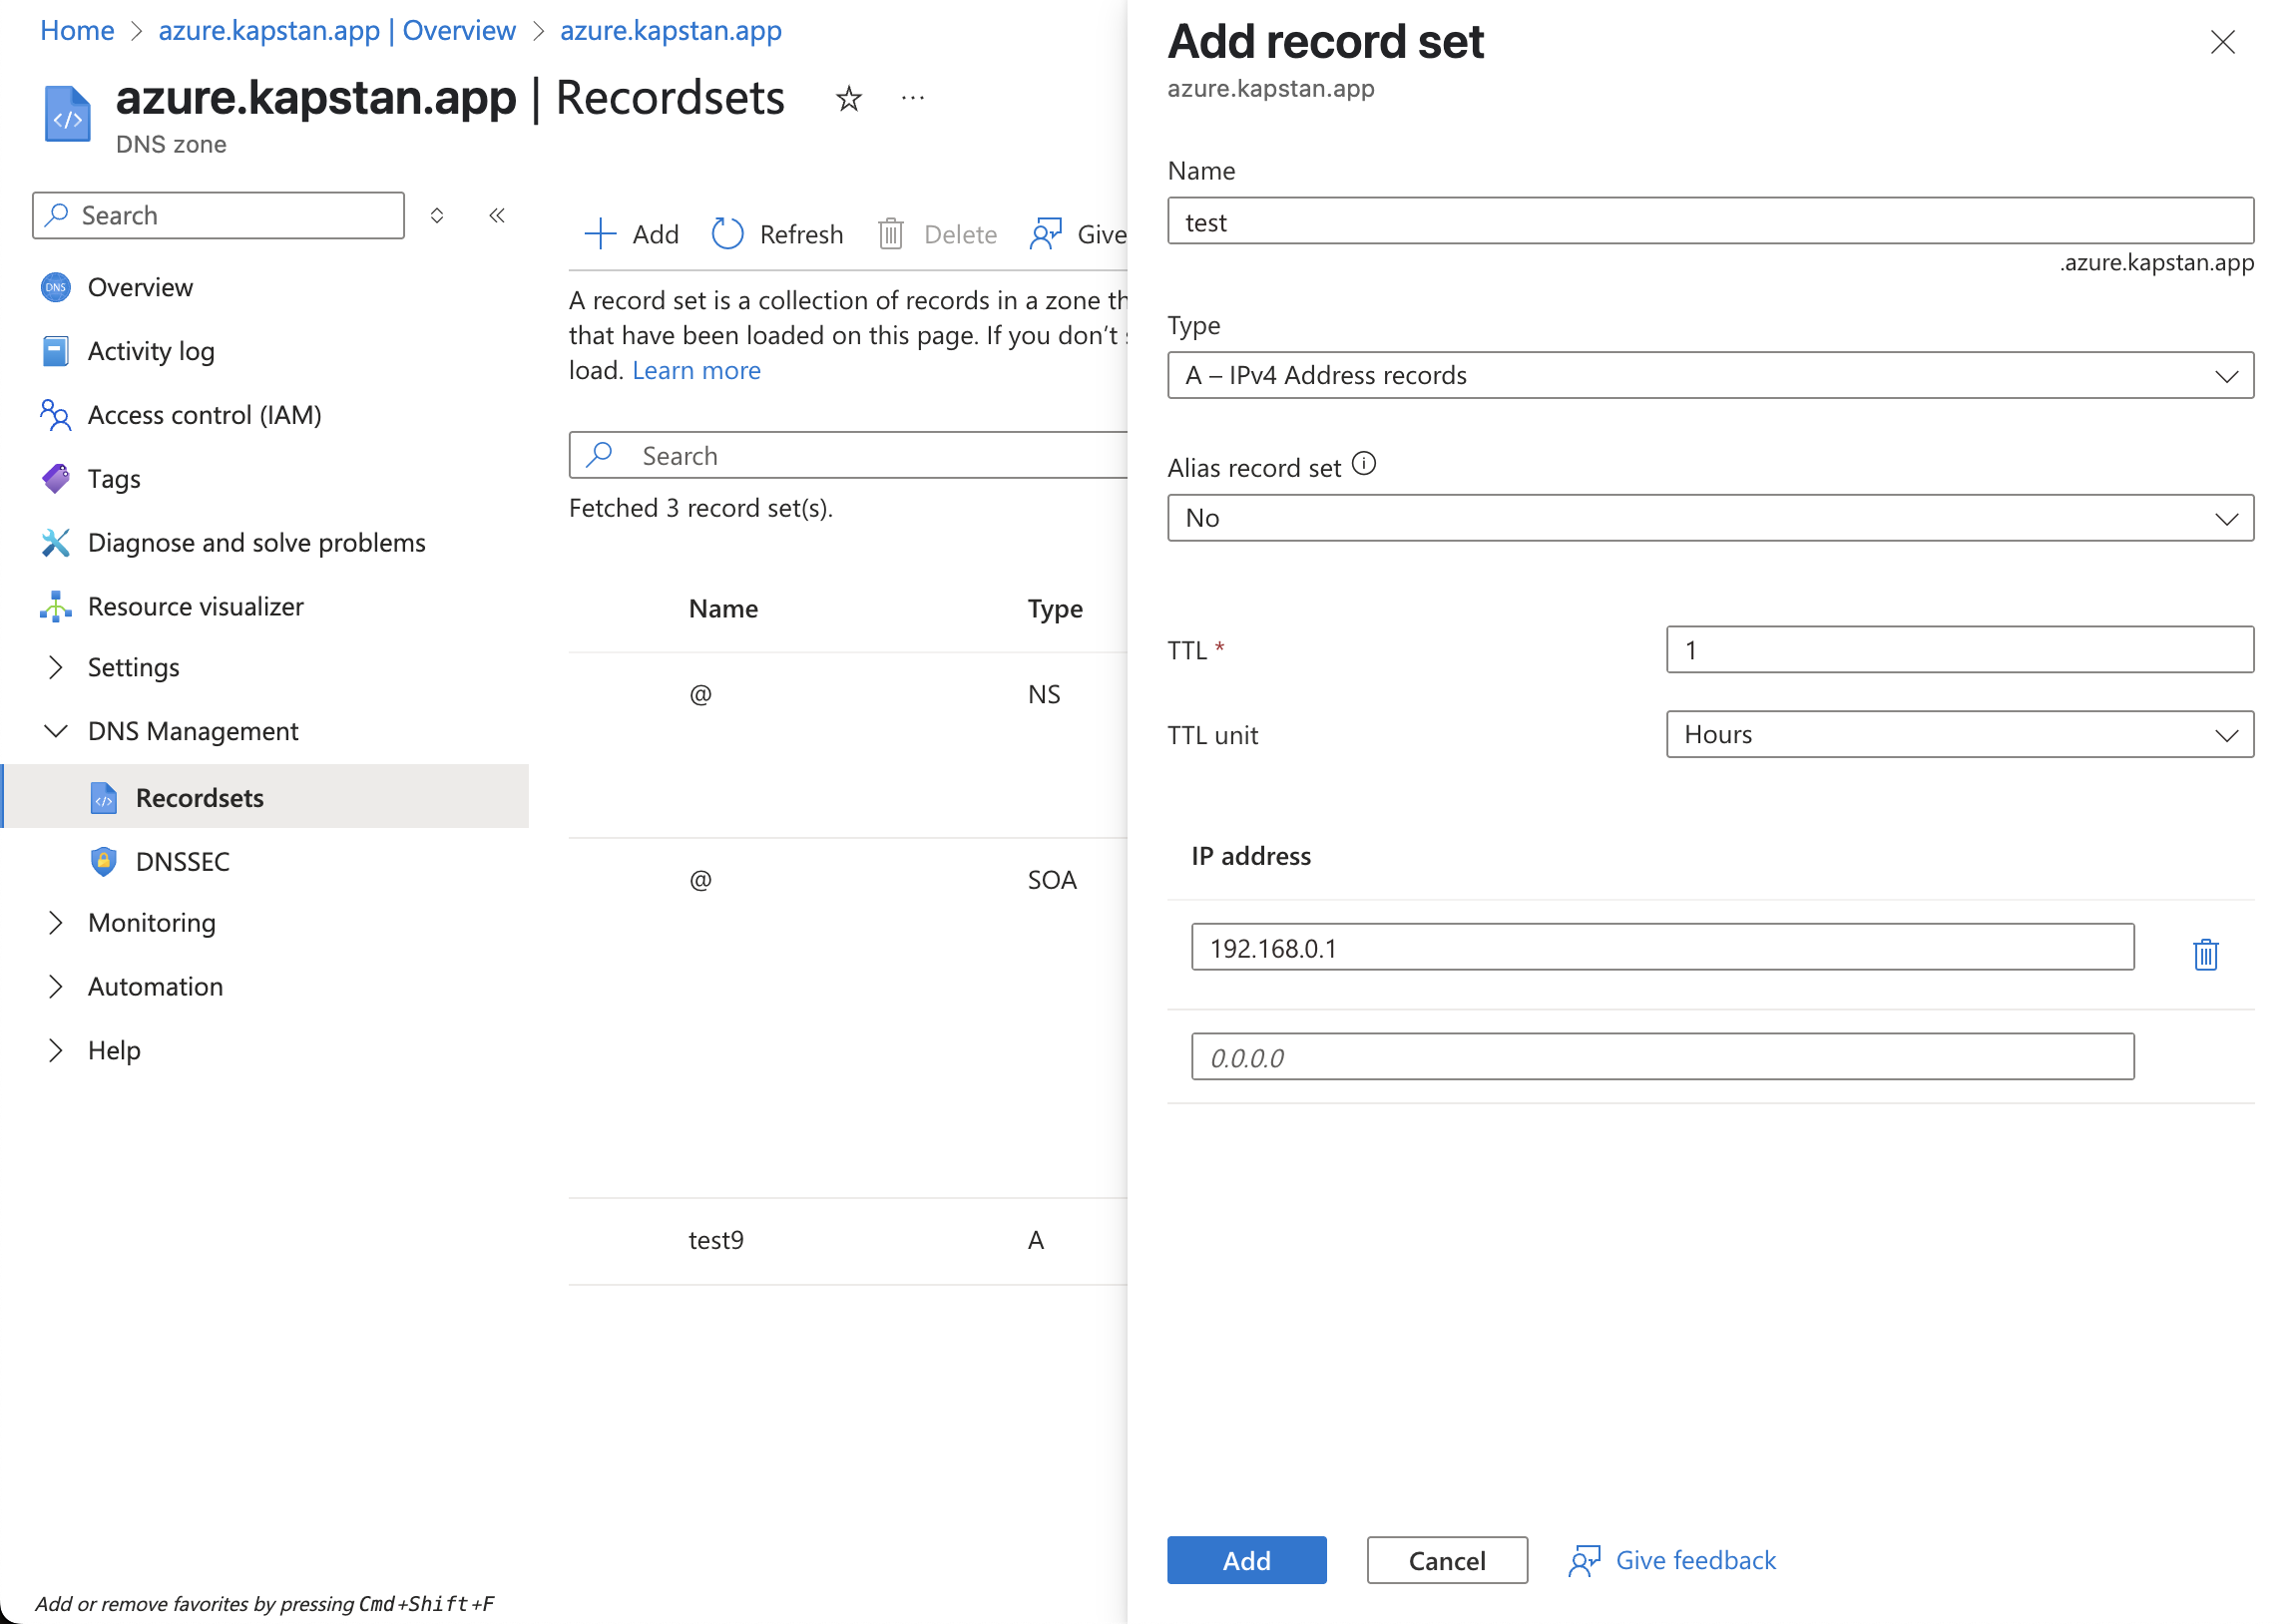
-
You can verify if your DNS changes are propagated using the Dig Web Interface.
-
DNS resolutions are cached. You can flush the local DNS cache for faster testing.
- On Mac:
sudo dscacheutil -flushcache; sudo killall -HUP mDNSResponder - On Windows:
ipconfig /flushdns
- On Mac:

