
Hardware, scaling and storage
Scaling
Real-world applications need scaling to handle varying loads on the system. Kapstan provides two scaling options:
Manual
If you want to tightly control the number of replicas your service is running, you can select manual scaling. To manually scale the service, follow these steps:
- Select "Manual Scaling".
- Enter the number of pods you want to run.
- Click on "Save".
By default Kapstan provisions one replica per service.
Auto Scaling
You can choose this option to auto-scale based on the CPU or Memory utilization of the service. To enable the auto-scaling, select "Auto Scaling" and then set the following parameters:
- Minimum Pods: The minimum number of pod replicas that the service can scale down to in case of low resource consumption.
- Maximum Pods: The maximum number of pod replicas that the service can scale up to in case of high resource consumption.
- Target CPU Utilization: Average target CPU utilization which the system needs to maintain. It is set at 60% by default. Kapstan will take this as an input to scale the pods up or down if the current value is higher or lower than the set target.
- Target Memory Utilization: Average target memory utilization which the system needs to maintain. It is set at 60% by default. Kapstan will take this as an input to scale the pods up or down if the current value is higher or lower than the set target.
Auto Scaling Triggers
Scaling based on CPU and Memory utilization is generally sufficient for most applications. However, there are scenarios where scaling based on external metrics is more effective. To address these use cases, Kapstan supports the concept of triggers.
Triggers allow you to scale your applications based on various external metrics, providing more granular control and flexibility in managing service load. Currently, Kapstan supports AWS SQS as a trigger, and we plan to add more triggers in the future to enhance our scaling capabilities.
This setup, powered by KEDA (Kubernetes Event-Driven Autoscaling), ensures that your service can handle varying loads effectively.
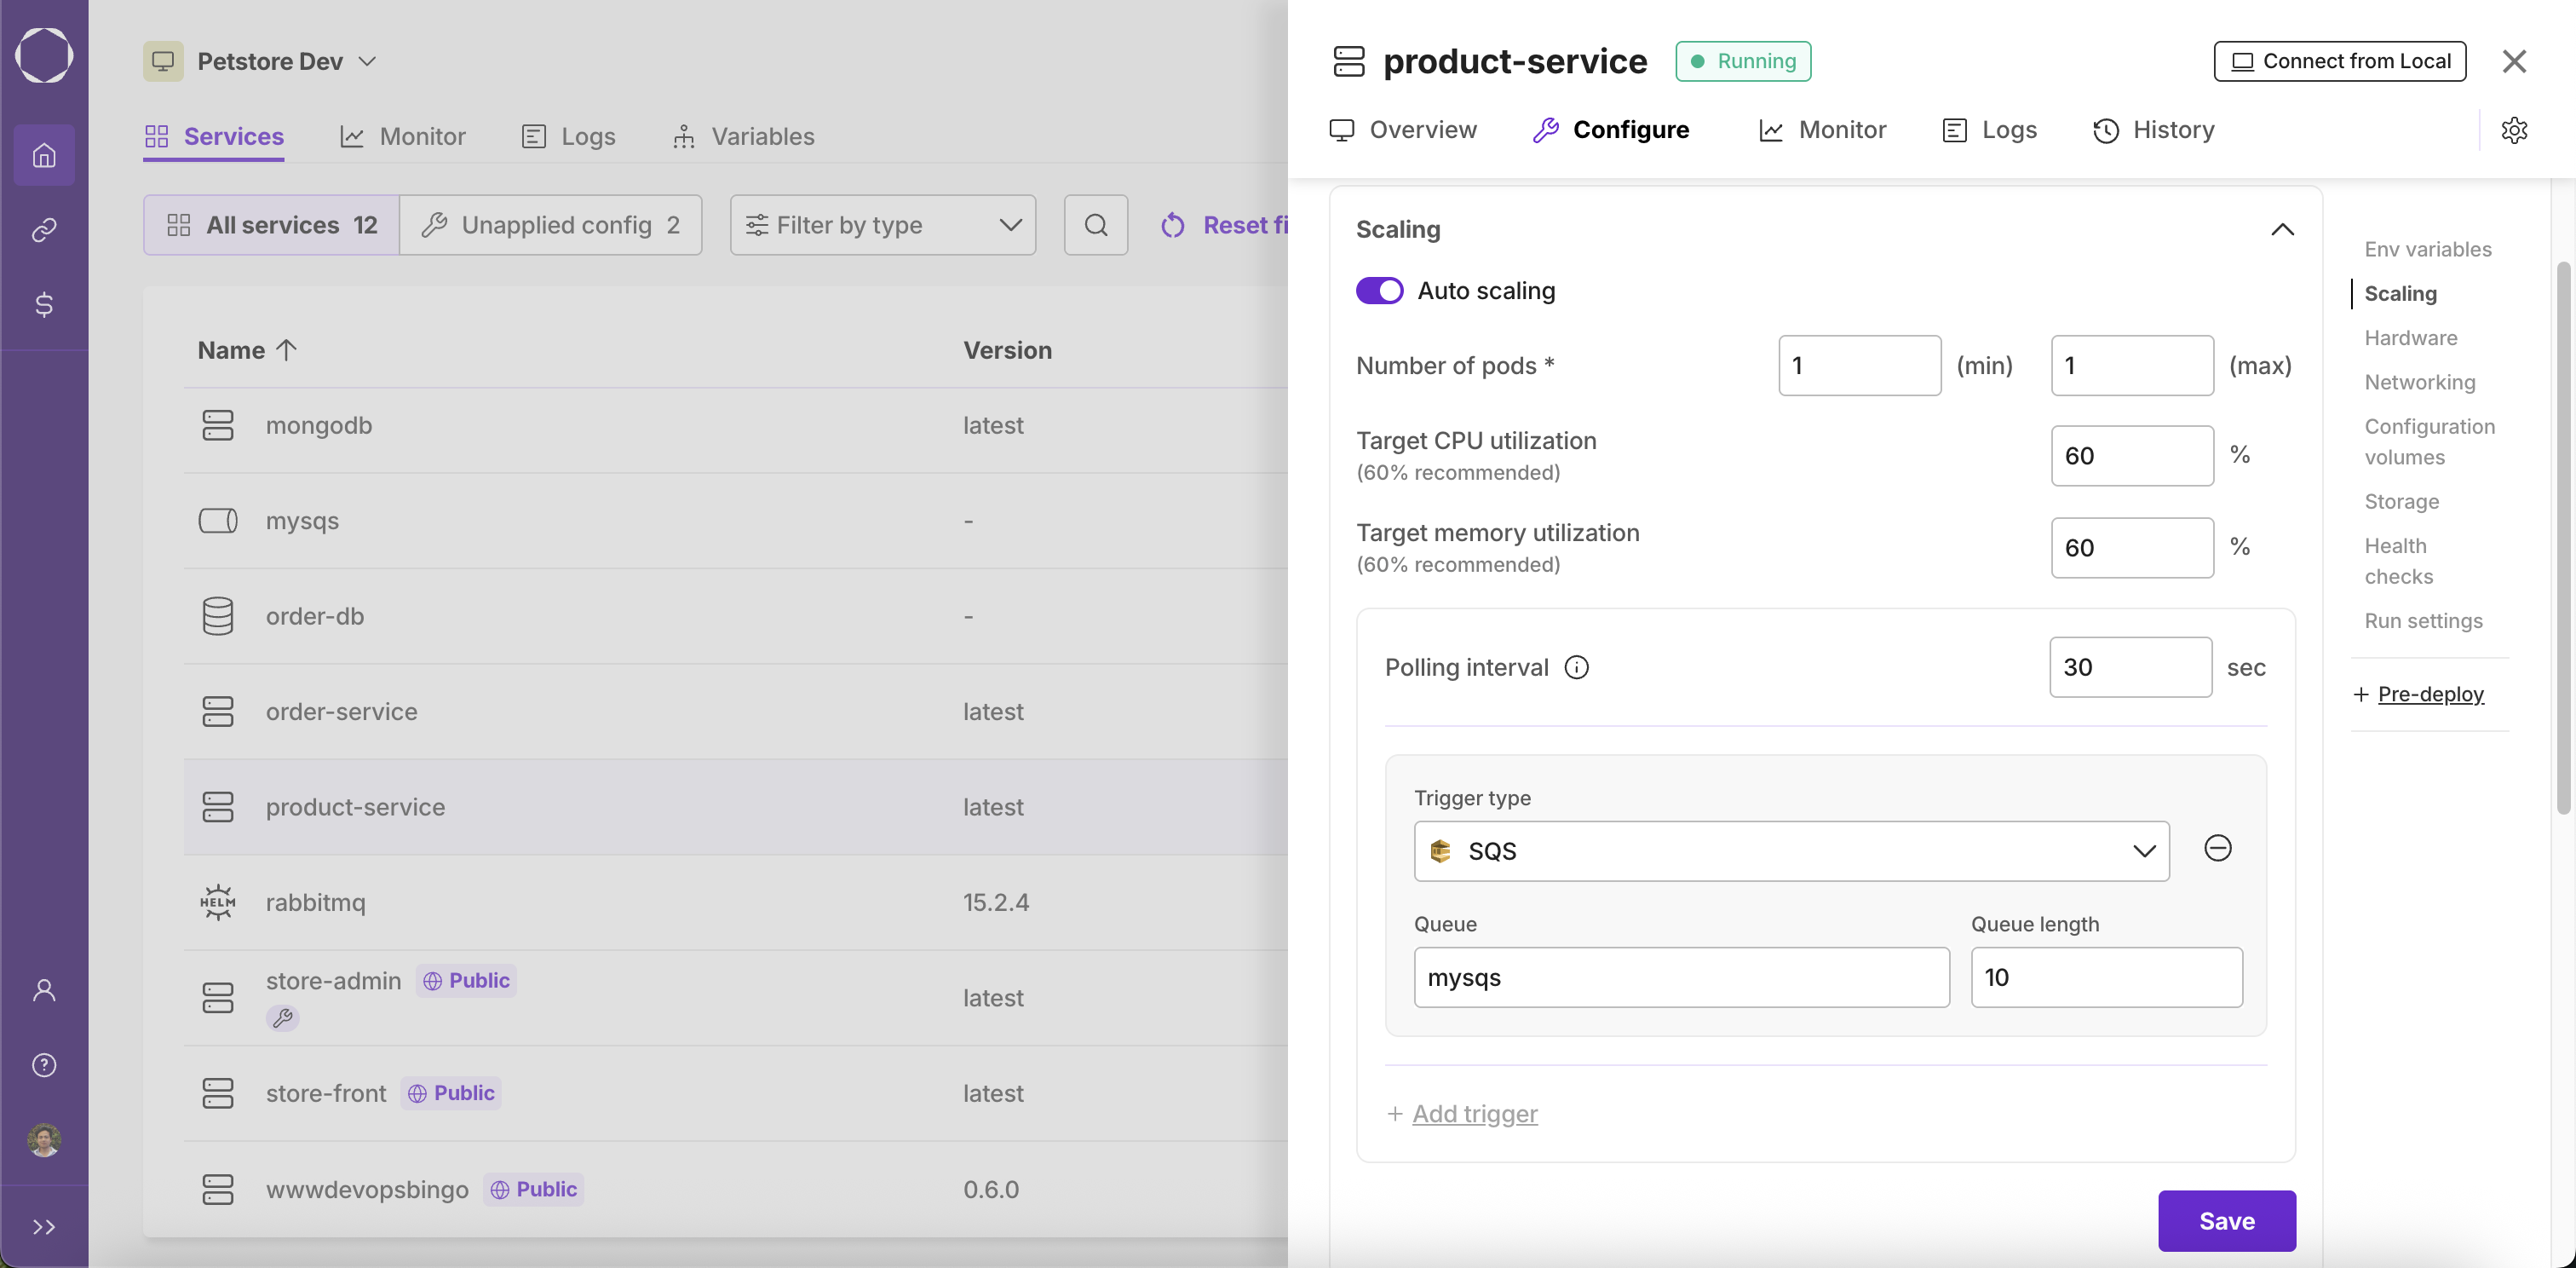
AWS SQS
For applications using AWS SQS queue, auto-scaling can be achieved based on the length of the SQS queue. To enable this feature, select "SQS" as the trigger type and then set the parameters
- Queue: Select one of your SQS queue services or enter URL of the desired SQS queue.
- Queue Length: The queue length parameter defines the maximum number of messages that a single instance of the service can handle concurrently. For example, if the Queue Length is set to 10:
- If the SQS queue has 9 pending messages, 1 instance of the service will be running.
- If the SQS queue has 15 pending messages, 2 instances of the service will be running.
- If the SQS queue has between 21 and 30 pending messages, 3 instances of the service will be running.
This scaling mechanism ensures that the number of service instances dynamically adjusts based on the queue length, optimizing resource utilization.
Schedule-based Autoscaling
There are scenarios where you want your service to scale up or down automatically based on a fixed schedule, rather than resource usage or queue length. For example, you may want to increase the number of service instances during business hours and scale down during off-peak times to save costs. Schedule-based autoscaling is ideal for predictable workloads, such as:
- Batch processing jobs that run at specific times.
- Applications with known peak and off-peak hours (e.g., 9 AM to 6 PM).
- Cost optimization by reducing resources during nights or weekends.
How to Configure a Schedule-based Autoscaling Trigger
Kapstan supports schedule-based autoscaling using KEDA's Cron trigger. This allows you to define time windows and the desired number of replicas for your service.
To configure a schedule-based trigger:
-
Navigate to the Scaling Tab
Go to your service's configuration and select the "Scaling" tab. -
Add a New Trigger
Click on "+ Add trigger" and selectScheduleas the trigger type. -
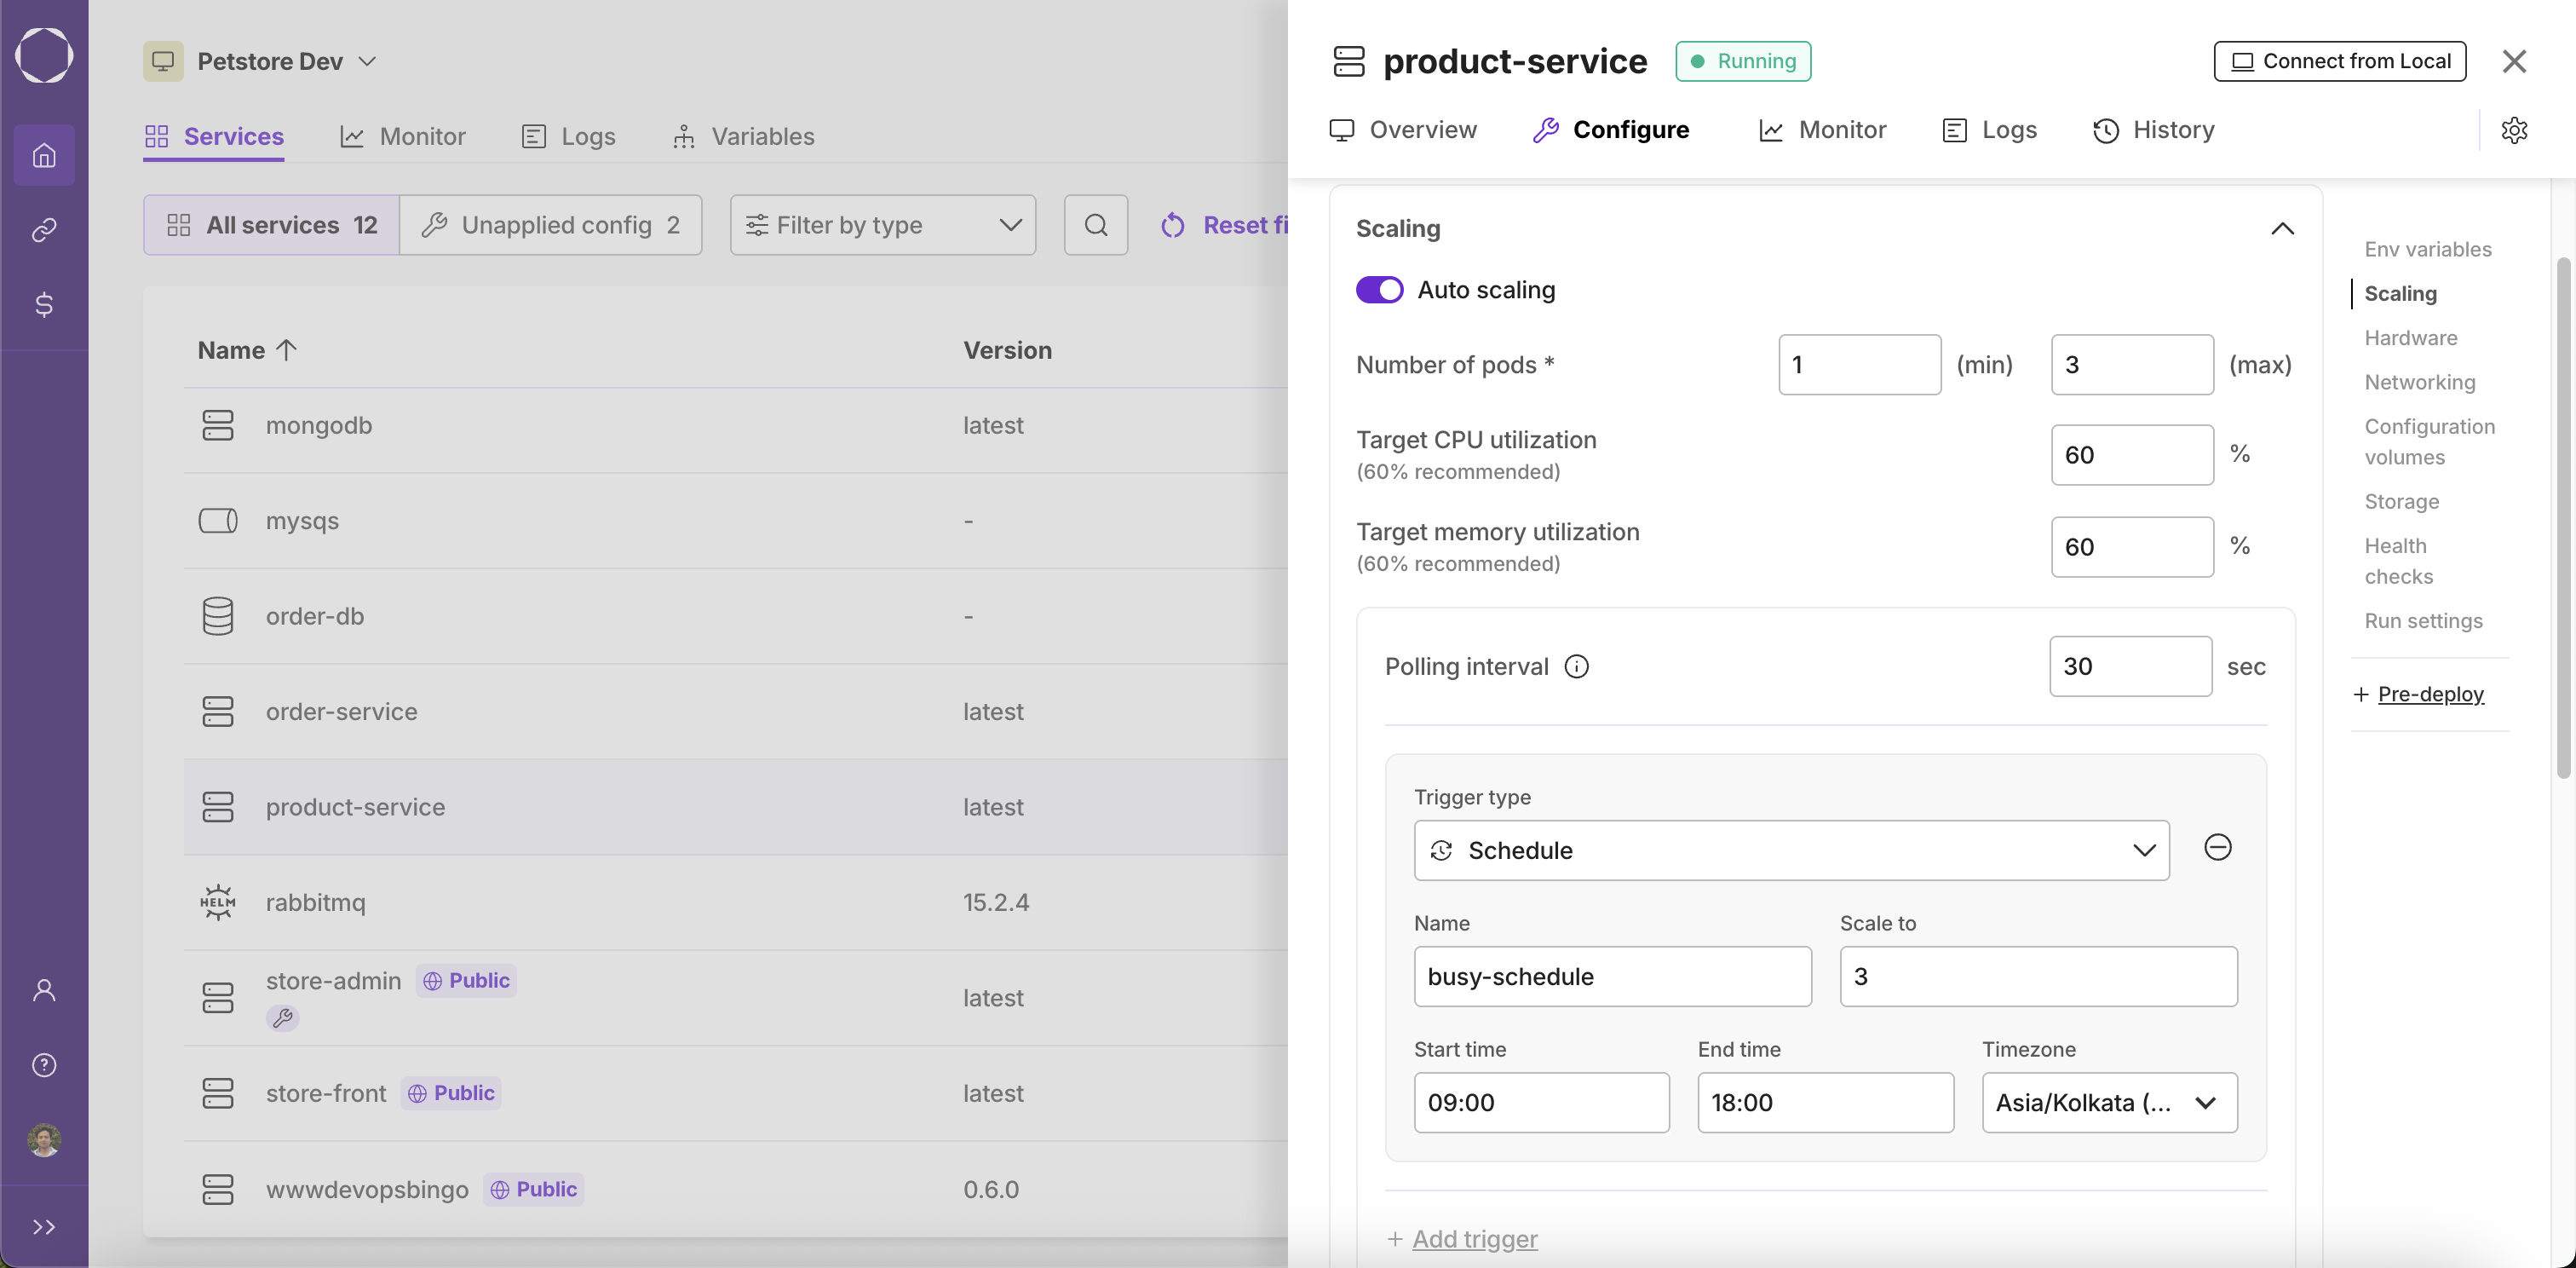
Fill in the Schedule Details
- Name: Enter a name for your schedule (e.g.,
business-hours-scale-up). - Scale to: Specify the number of replicas you want during the scheduled time window.
- Start time: Set the time when scaling should begin (e.g.,
09:00). - End time: Set the time when scaling should end (e.g.,
18:00). - Timezone: Select the appropriate timezone for your schedule.
- Name: Enter a name for your schedule (e.g.,
-
Save the Configuration
Click "Save" to apply the schedule-based scaling rule. -
Result
Your service will automatically scale to the specified number of replicas during the defined time window and revert to the default or another scaling rule outside this window.
Example
Suppose you want your service to run 5 replicas from 9:00 AM to 6:00 PM (UTC+05:30), and scale down to 1 replica outside these hours. You would:
- Set Scale to: 5
- Start time: 09:00
- End time: 18:00
- Timezone: Asia/Kolkata (UTC+05:30)
Kapstan will ensure your service scales up and down according to this schedule, optimizing resource usage and cost.
Kafka
Coming Soon
Hardware
Architecture: You can choose the underlying architecture to run your service:
- ARM64: Choose this if your service image is built for ARM64 architecture
- AMD64/x86-64: Choose this if your service image is built for AMD64/x86-64 architecture
- Any: Choose this if your service image is built for both ARM64 and AMD64/x86-64 architectures
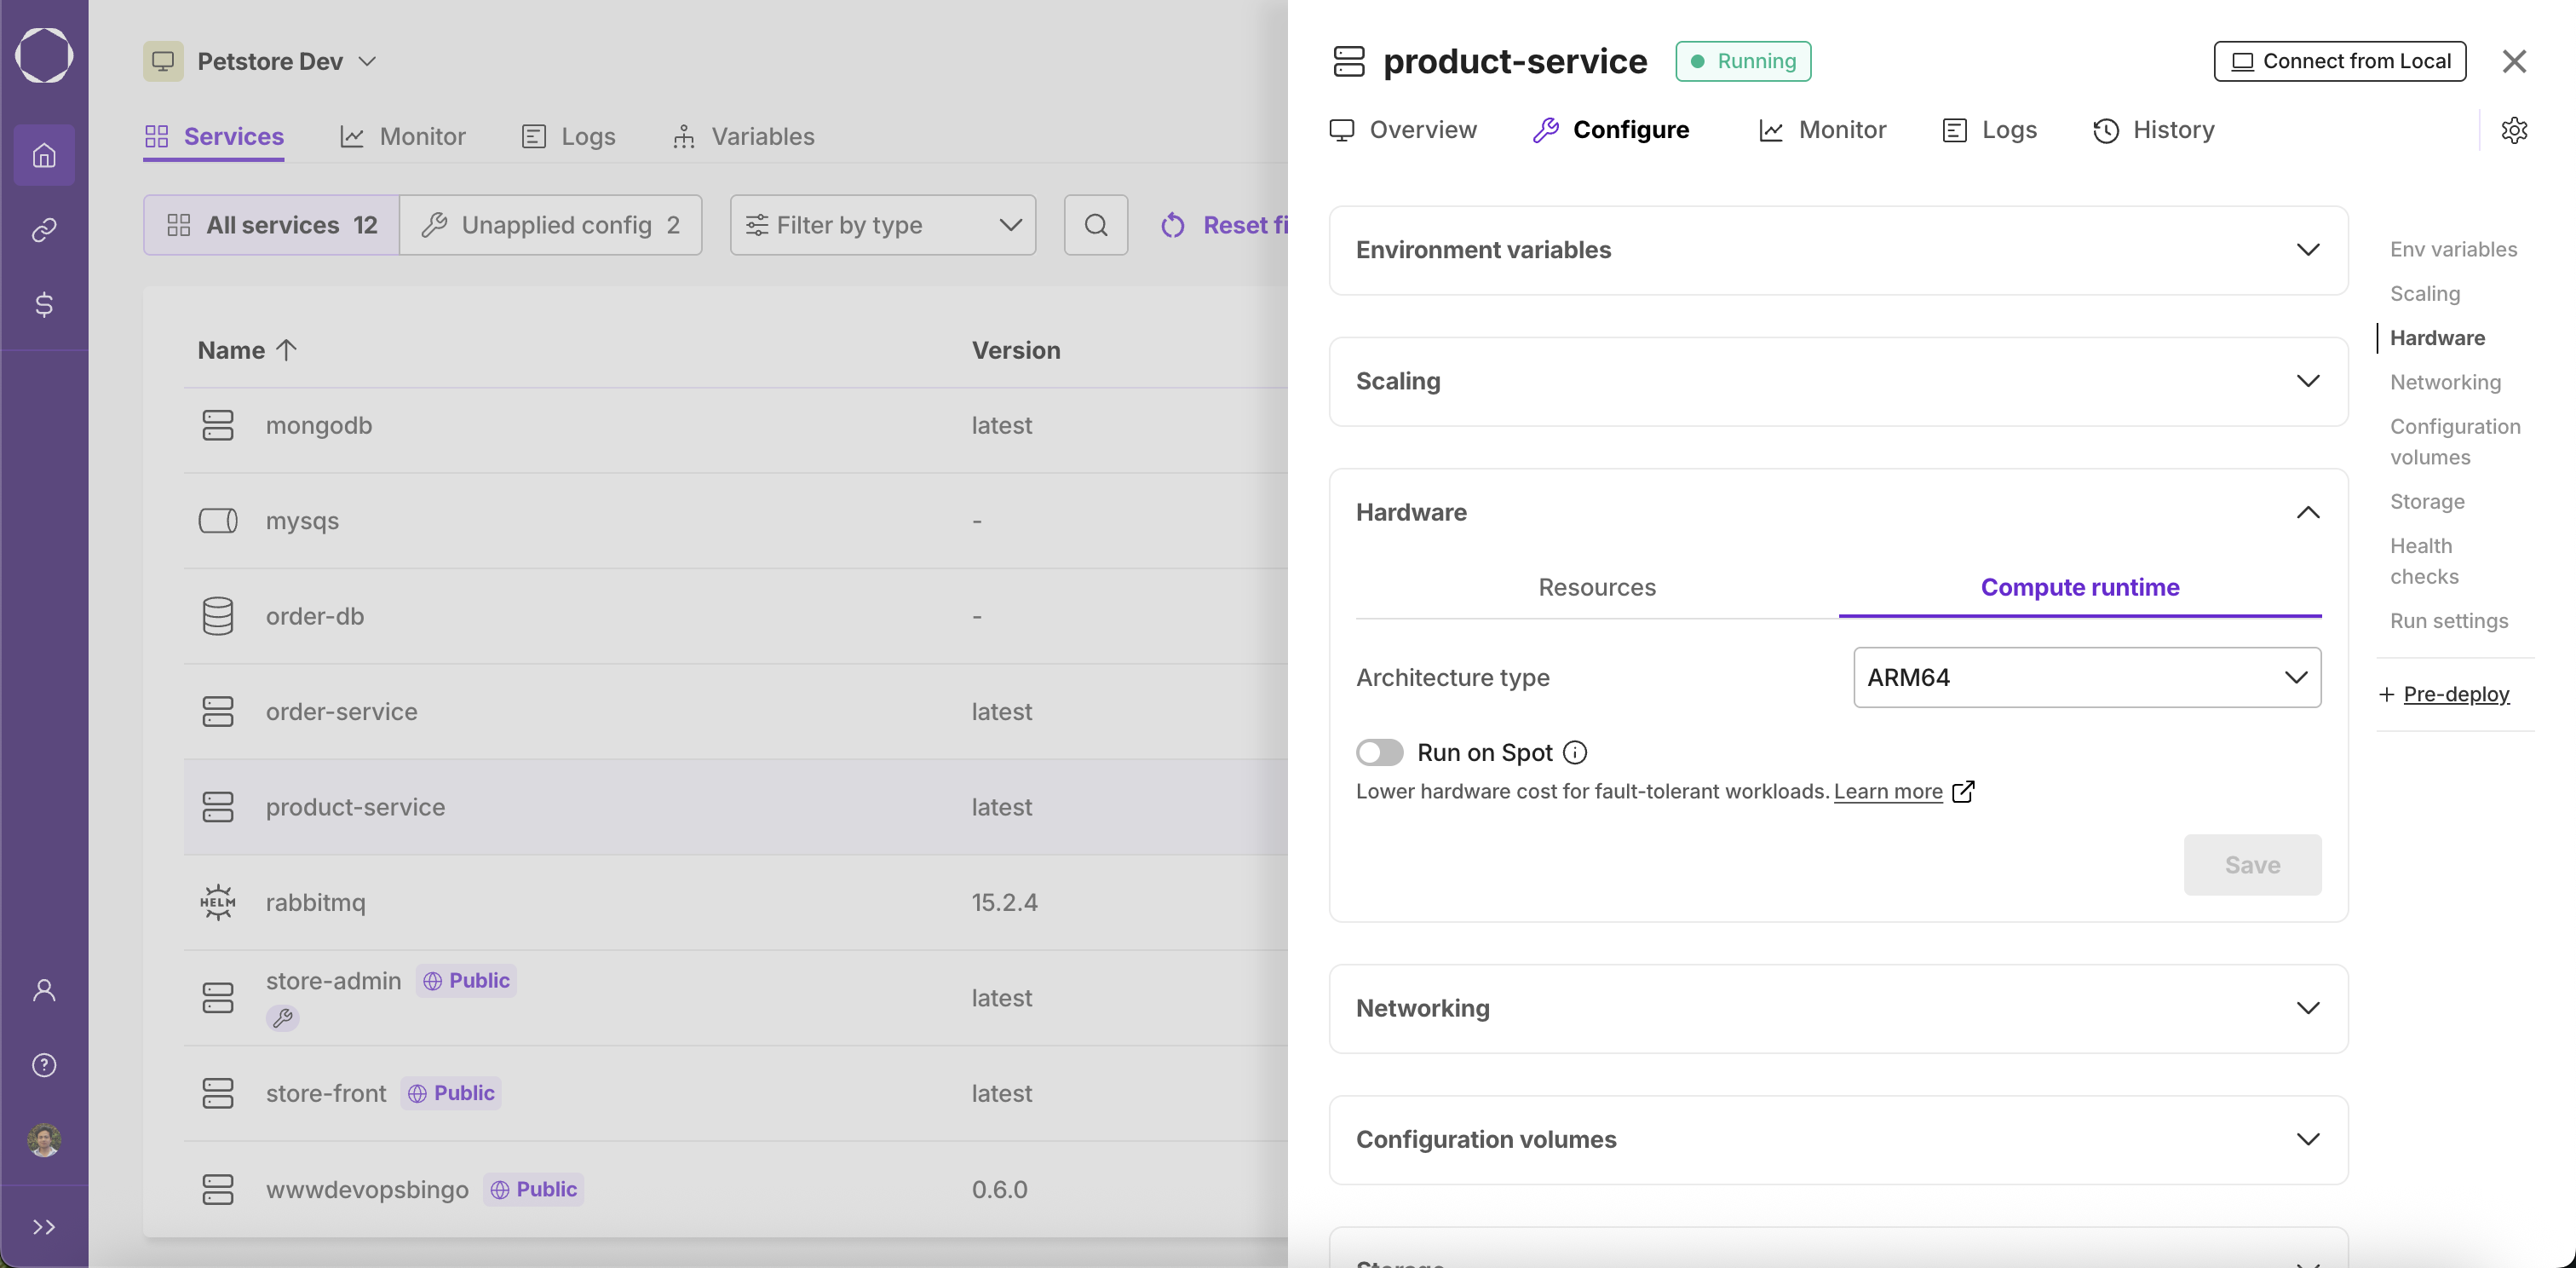
Run on Spot enables your service to use spot instances—spare compute resources offered at a lower price than standard (on-demand) instances. Spot instances are suitable for fault-tolerant workloads that can handle interruptions, as these resources may be reclaimed by the cloud provider at any time. If spot instances are unavailable, Kapstan will automatically switch to on-demand instances to maintain service availability.
When to use:
- Lower your infrastructure costs for stateless services, batch jobs, or workloads that can tolerate restarts or interruptions.
Resources
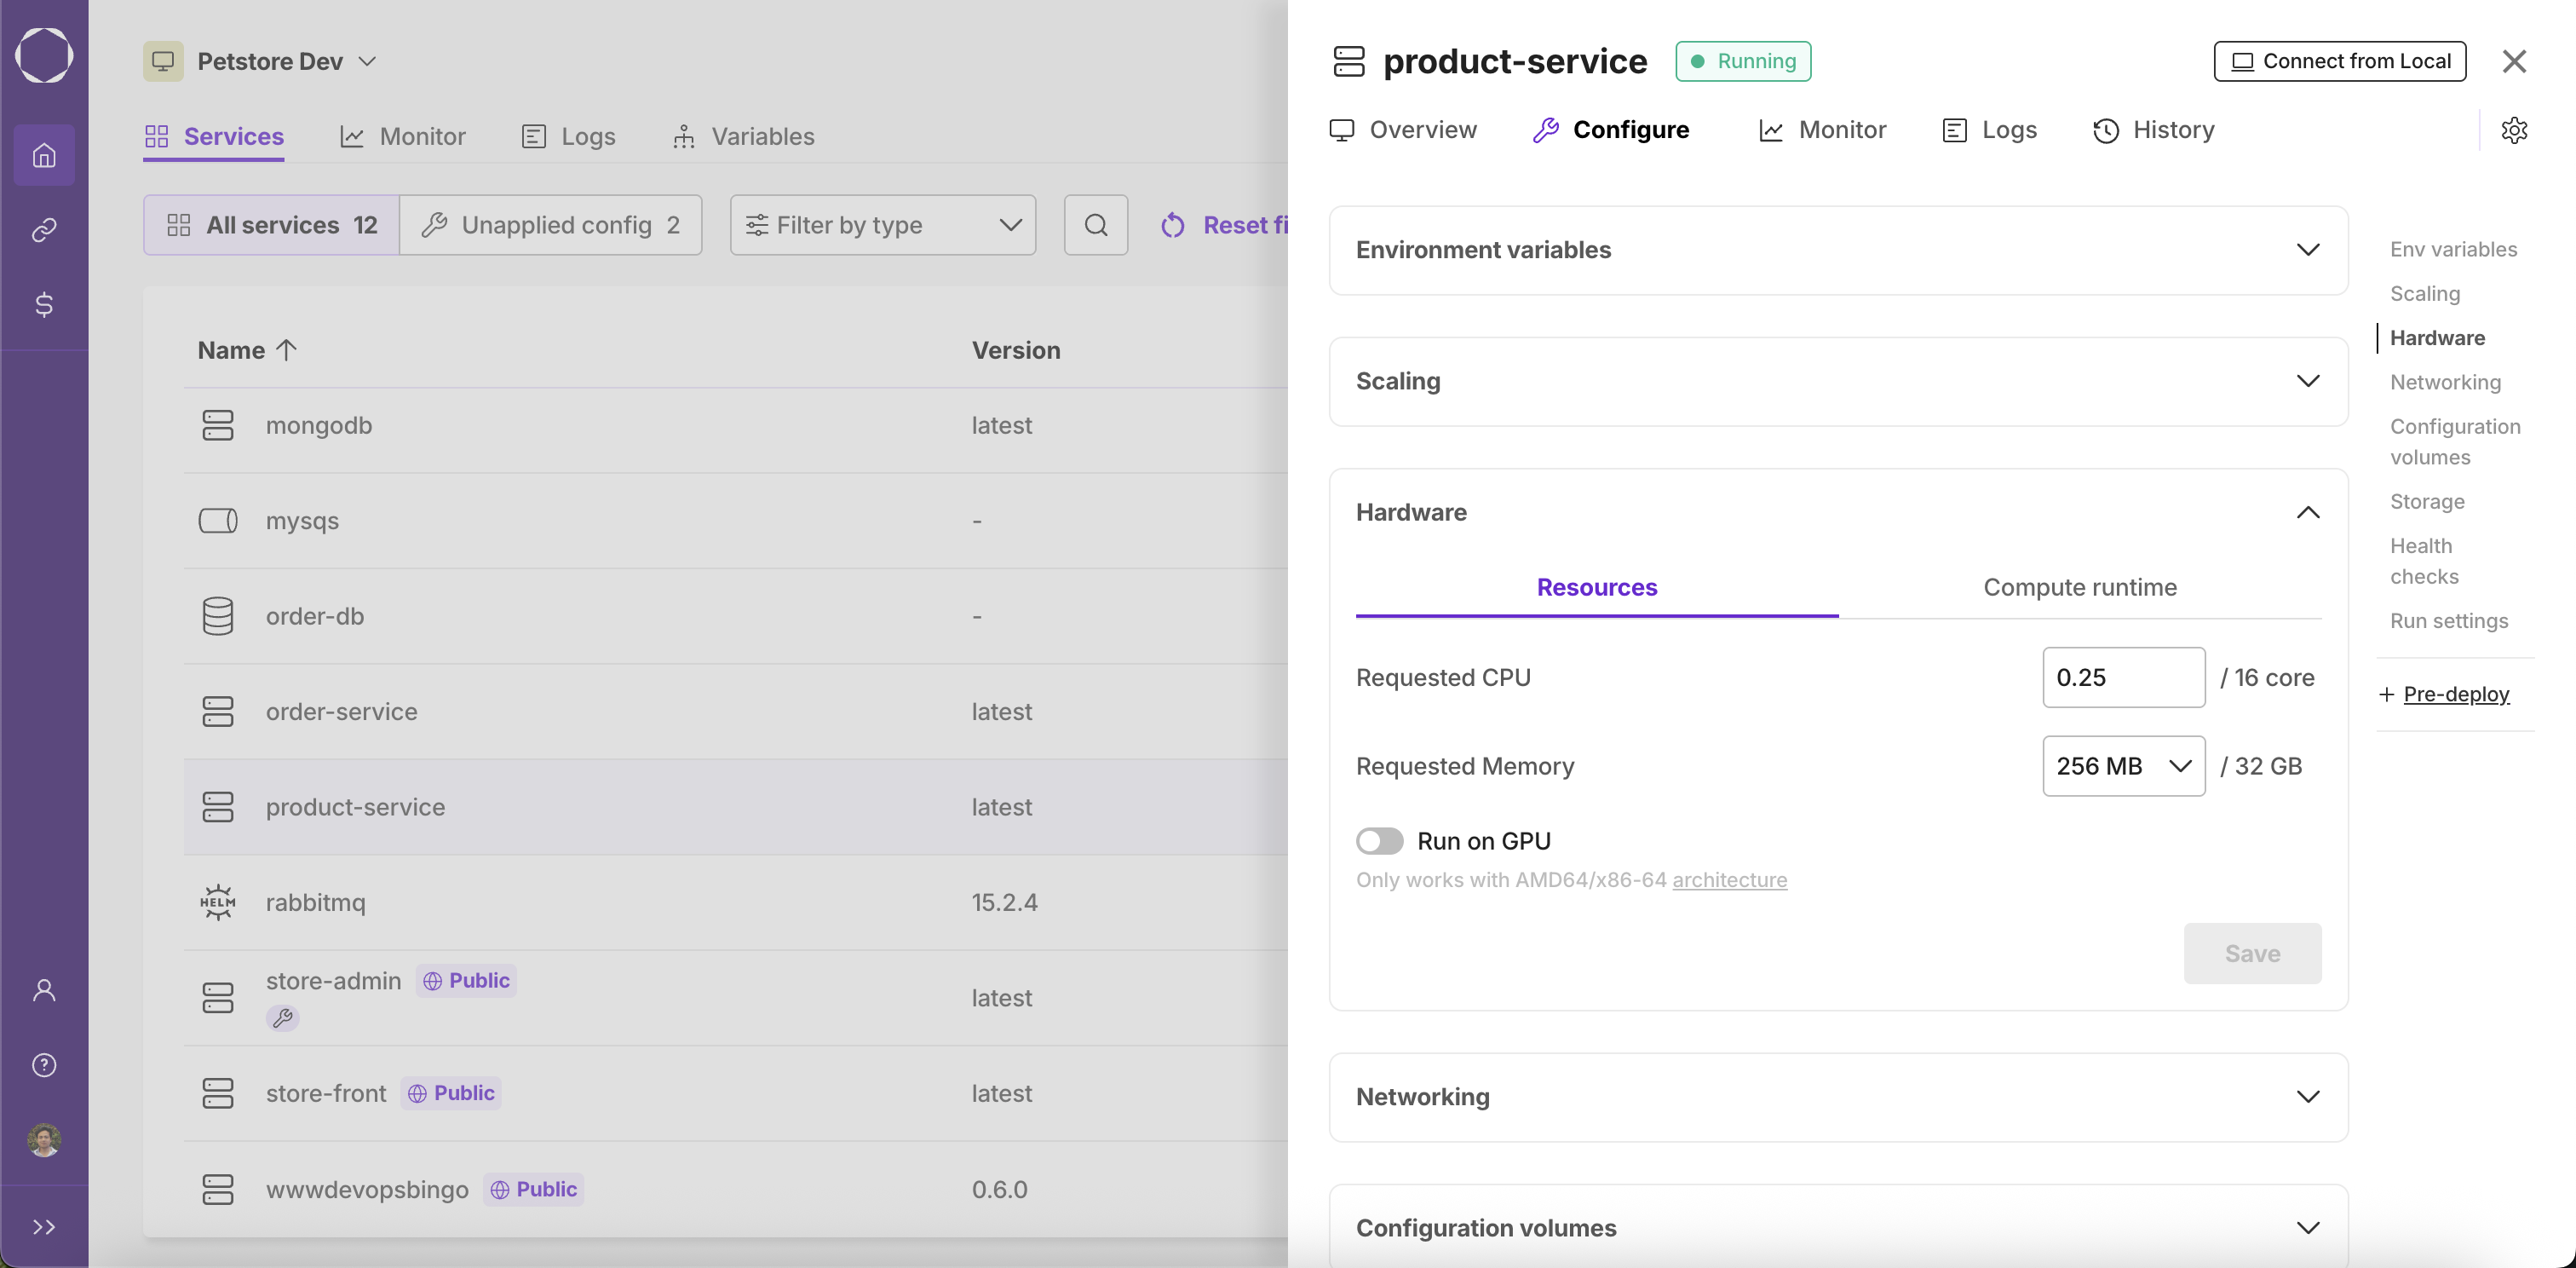
You can allocate CPU and memory resources to your container based on your service's requirements. The following options are available in the Resources tab:
- Requested CPU: Enter the number of CPU cores your container should request. The UI displays the value as a fraction of the total available cores (e.g.,
0.25 / 16 core). - Requested Memory: Select the amount of memory (RAM) your container should request from the dropdown. The UI displays the value as a fraction of the total available memory (e.g.,
256 MB / 32 GB). - Run on GPU: Enable this toggle if your service requires a GPU. This option is only available when the architecture is set to AMD64/x86-64. A note and link to the architecture setting are shown in the UI when this option is available.
Learn more about CPU cores.
GPU-based service example
This is an example for how you can setup a simple GPU based service that does a vector addition using a community-built docker image.
Follow these steps to run this image on Kapstan:
- Add this image to your container registry. Learn more about container registry connection, here.
- Create a container service and use the above image while configuring the container.
- Once the service is created, go to the "Hardware" tab and select the "AMD64/x86-64" architecture in the "Compute instance" sub-tab and then tick the "Run on GPU" option in the "Resources" sub-tab.
- Save the configurations and deploy the service.
- Check the logs by clicking on the "Logs" tab. You should see the logs of the service running successfully.
Storage
You can use this to add ephemeral storage to your container. Ephemeral storage is temporary and does not persist across deployments, pod restarts or rescheduling. It can be used to for data processing, caching, or storing non-critical data.
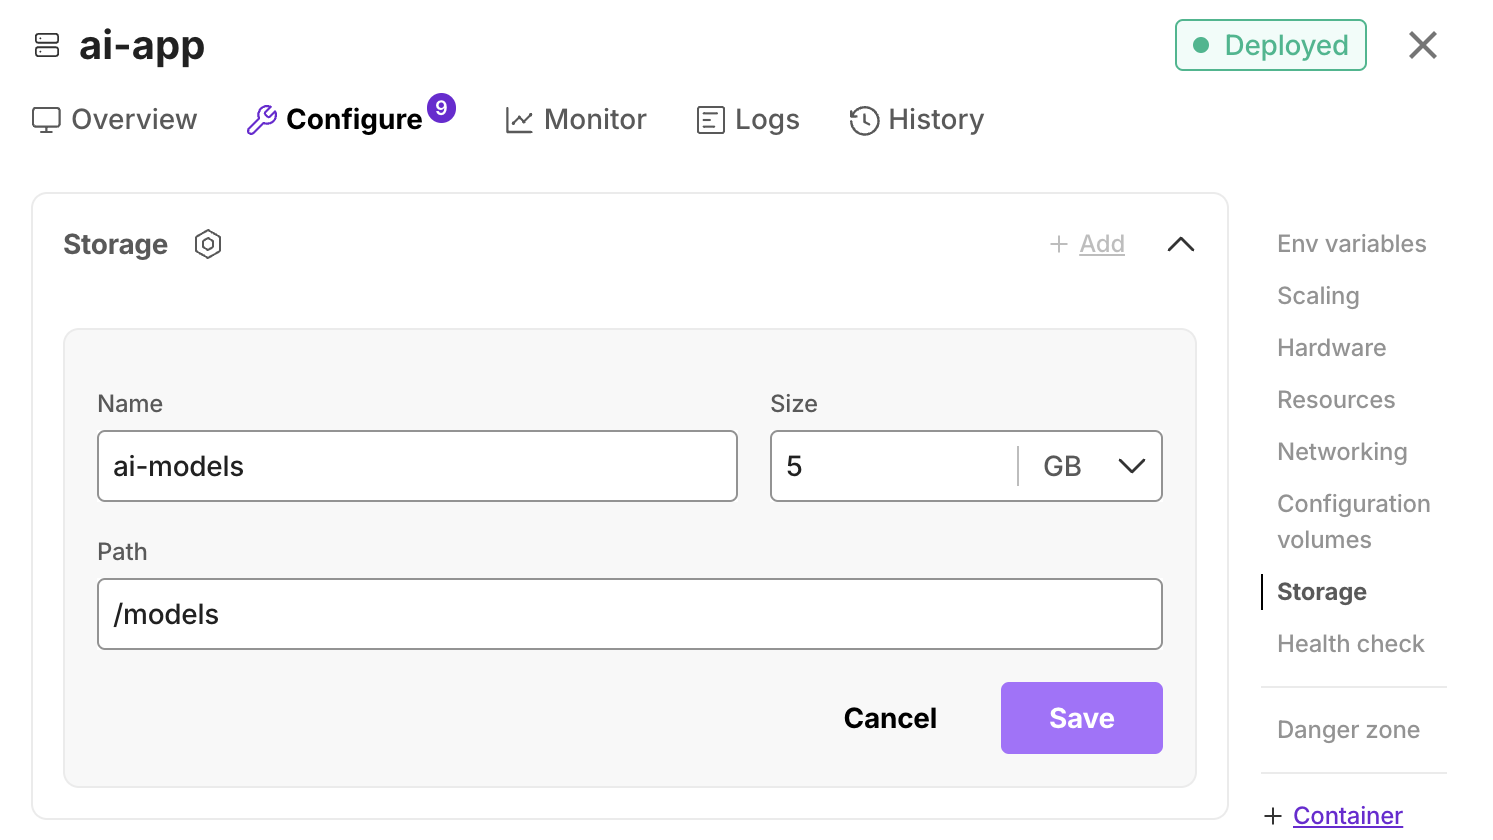
Adding ephemeral storage
- Volume name: A meaningful name for identification.
- Path: The path on which you want to mount the storage inside the container. E.g.
/data - Size(Optional): Size of the storage. E.g., 100 MB.
Behavior based on size input
When size is specified:
The system allocates exactly the amount of ephemeral storage you requested.
Your service is guaranteed this amount of storage, but cannot exceed it.
If your service attempts to use more storage than allocated, it may encounter "out of space" errors or get evicted from the node.
When size is left empty:
The system uses a default allocation mechanism.
Your service can use as much ephemeral storage as available on the node, up to the node's limits.
This approach provides flexibility but may lead to unpredictable behavior if the node's resources are constrained.
