Container service
Follow the following steps to configure and deploy container applications.
Adding a Container Application
- Create a new container application:
- Click the "+" icon in the top-right corner and select "Container".
- Configure the application:
- Name: Enter a name for your application (e.g., nginx-server).
- Cluster: Select the Kubernetes cluster for deployment.
- Add a container:
- Container registry: Deploy an application from a public or private container registries.
- Option 1: Deploy from private container registry
- Select the container registry connection from where container image needs to be fetched. Learn more about container registry connection here.
- Image repository: Select the desired image repository.
- Image tag: Select the image tag you wish to deploy.
- Option 2: Public repository
- Select “Public repository” from the container registry dropdown.
- Public repository URL: Enter the public repository URL or name you would use to pull the image.
- Examples:
- Docker Hub:
nginxdocker.io/library/nginx
- GitHub Container Registry (GHCR):
ghcr.io/kapstan-io/agent
- Amazon Elastic Container Registry (ECR):
public.ecr.aws/karpenter/controller
- Other:
quay.io/prometheus/node-exporter
- Docker Hub:
- Examples:
- Image tag: Select the image tag you wish to deploy.
- Option 1: Deploy from private container registry
- Container registry: Deploy an application from a public or private container registries.
- Finalize and Deploy:
- Click "Confirm" to create the application and container.
- You'll be redirected to the application overview page to deploy the application.
Adding multiple containers within an application
- Initiate the process of creating a new container application by following the steps outlined in Adding a container application.
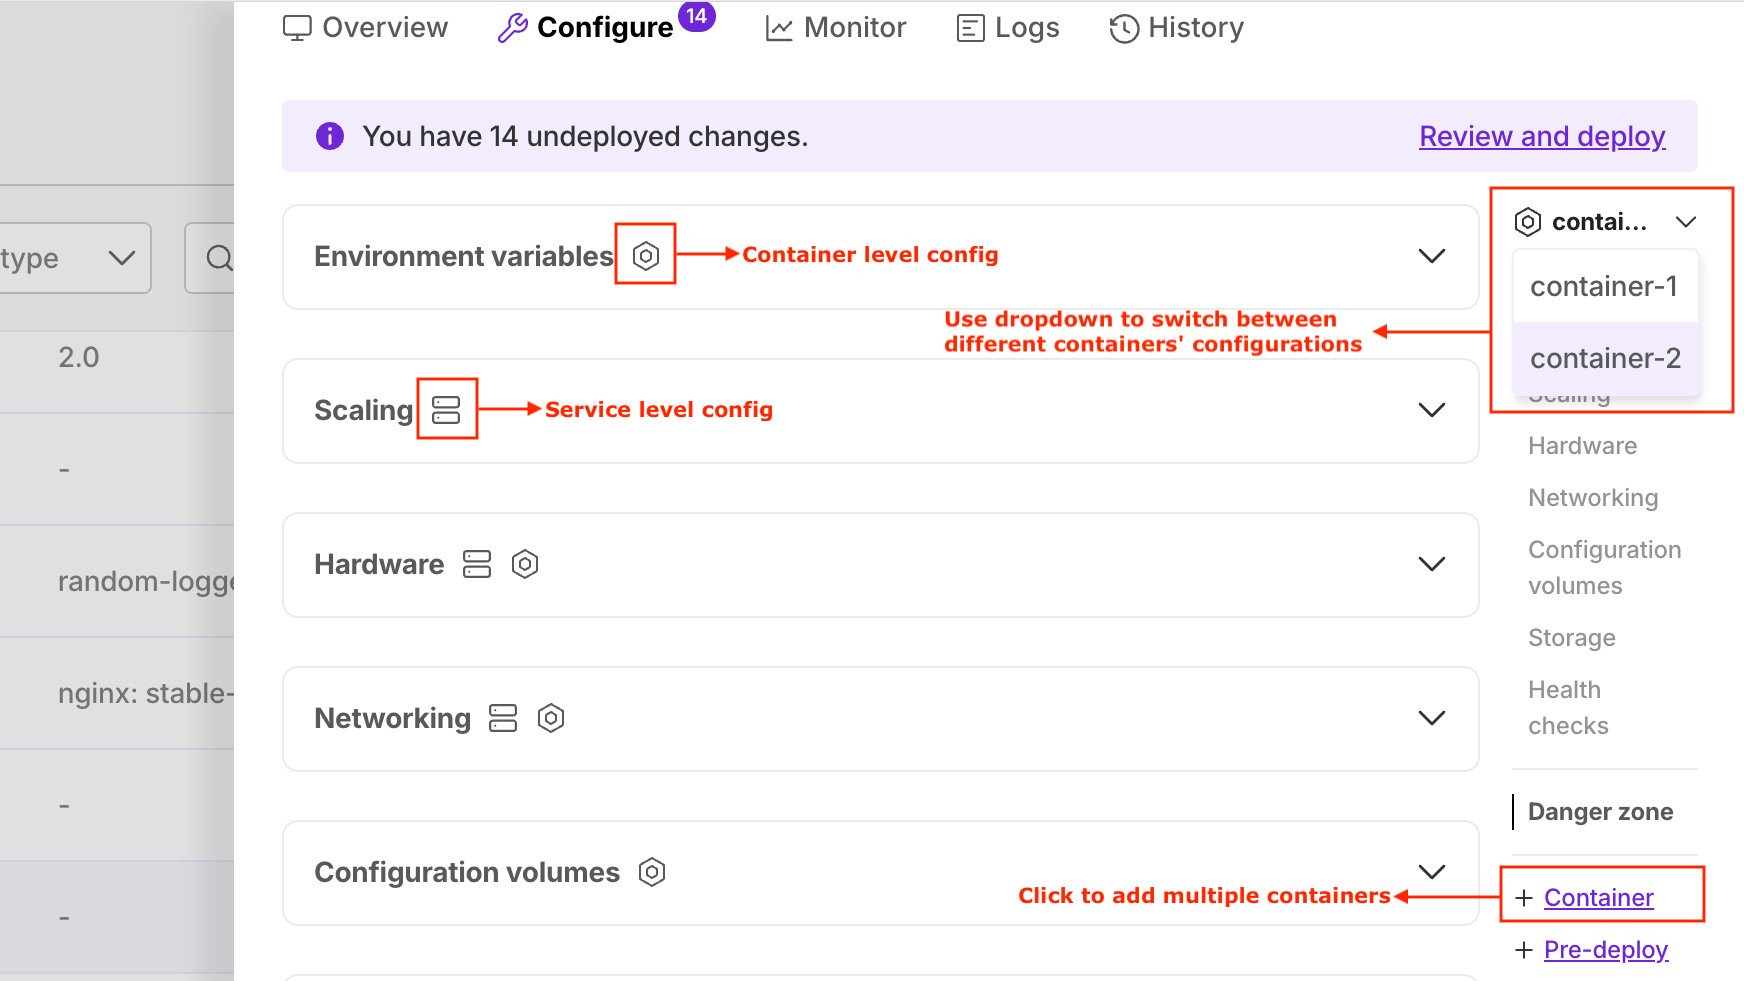
- Navigate to the application configuration tab and click
+ Containerbutton situated at the bottom right(refer to image at the bottom). Upon clicking this button, you will be prompted to configure the new container just like the previous container. - To modify the configuration of individual containers, utilize the container dropdown menu.

Configure application
Go to application configurations to learn more about application configurations like environment variables, networking, hardware and more.
Deploy
Go to deployment and event history to learn more about deploying the application and viewing the event history.

