Serverless Function
Serverless computing is a paradigm that allows developers to build and run applications without the need to manage the underlying servers. In the context of AWS, serverless doesn't mean there are no servers, but rather that you don't have to provision or manage them. Instead, AWS takes care of all the server management tasks, allowing developers to focus solely on their code.
This page will help guide you in provisioning serverless functions using Kapstan with a working demo. For this demo, we will be working with an AWS environment, but the process is similar for other cloud providers. We will be demonstrating a simple Python function described below.
import json
import requests
import os

def lambda_handler(event, context):
    response = {
        "statusCode": 200,
        "body": os.getenv("MESSAGE"),
        "headers": {
            'Content-Type': 'text/html',
        }
    }

    return response
You can download the zip file for the above code from here.
The code will respond to events with a 200 status code and a message defined in the MESSAGE environment variable. It is important to note the name of the function "lambda_handler", as this will be used later on in the tutorial.
Now that we have our code ready, let's jump into Kapstan to deploy it.
Steps to Create a Serverless Function
- Navigate to the Infrastructure Overview on Kapstan.
- Click on "Create" and then on "Serverless Function".
- Alternatively, you can also click here to create a new serverless function. It will create a new serverless function in your selected environment.
Configuration
Here's how your resource might look after filling out the arguments, lets break down each option in detail.
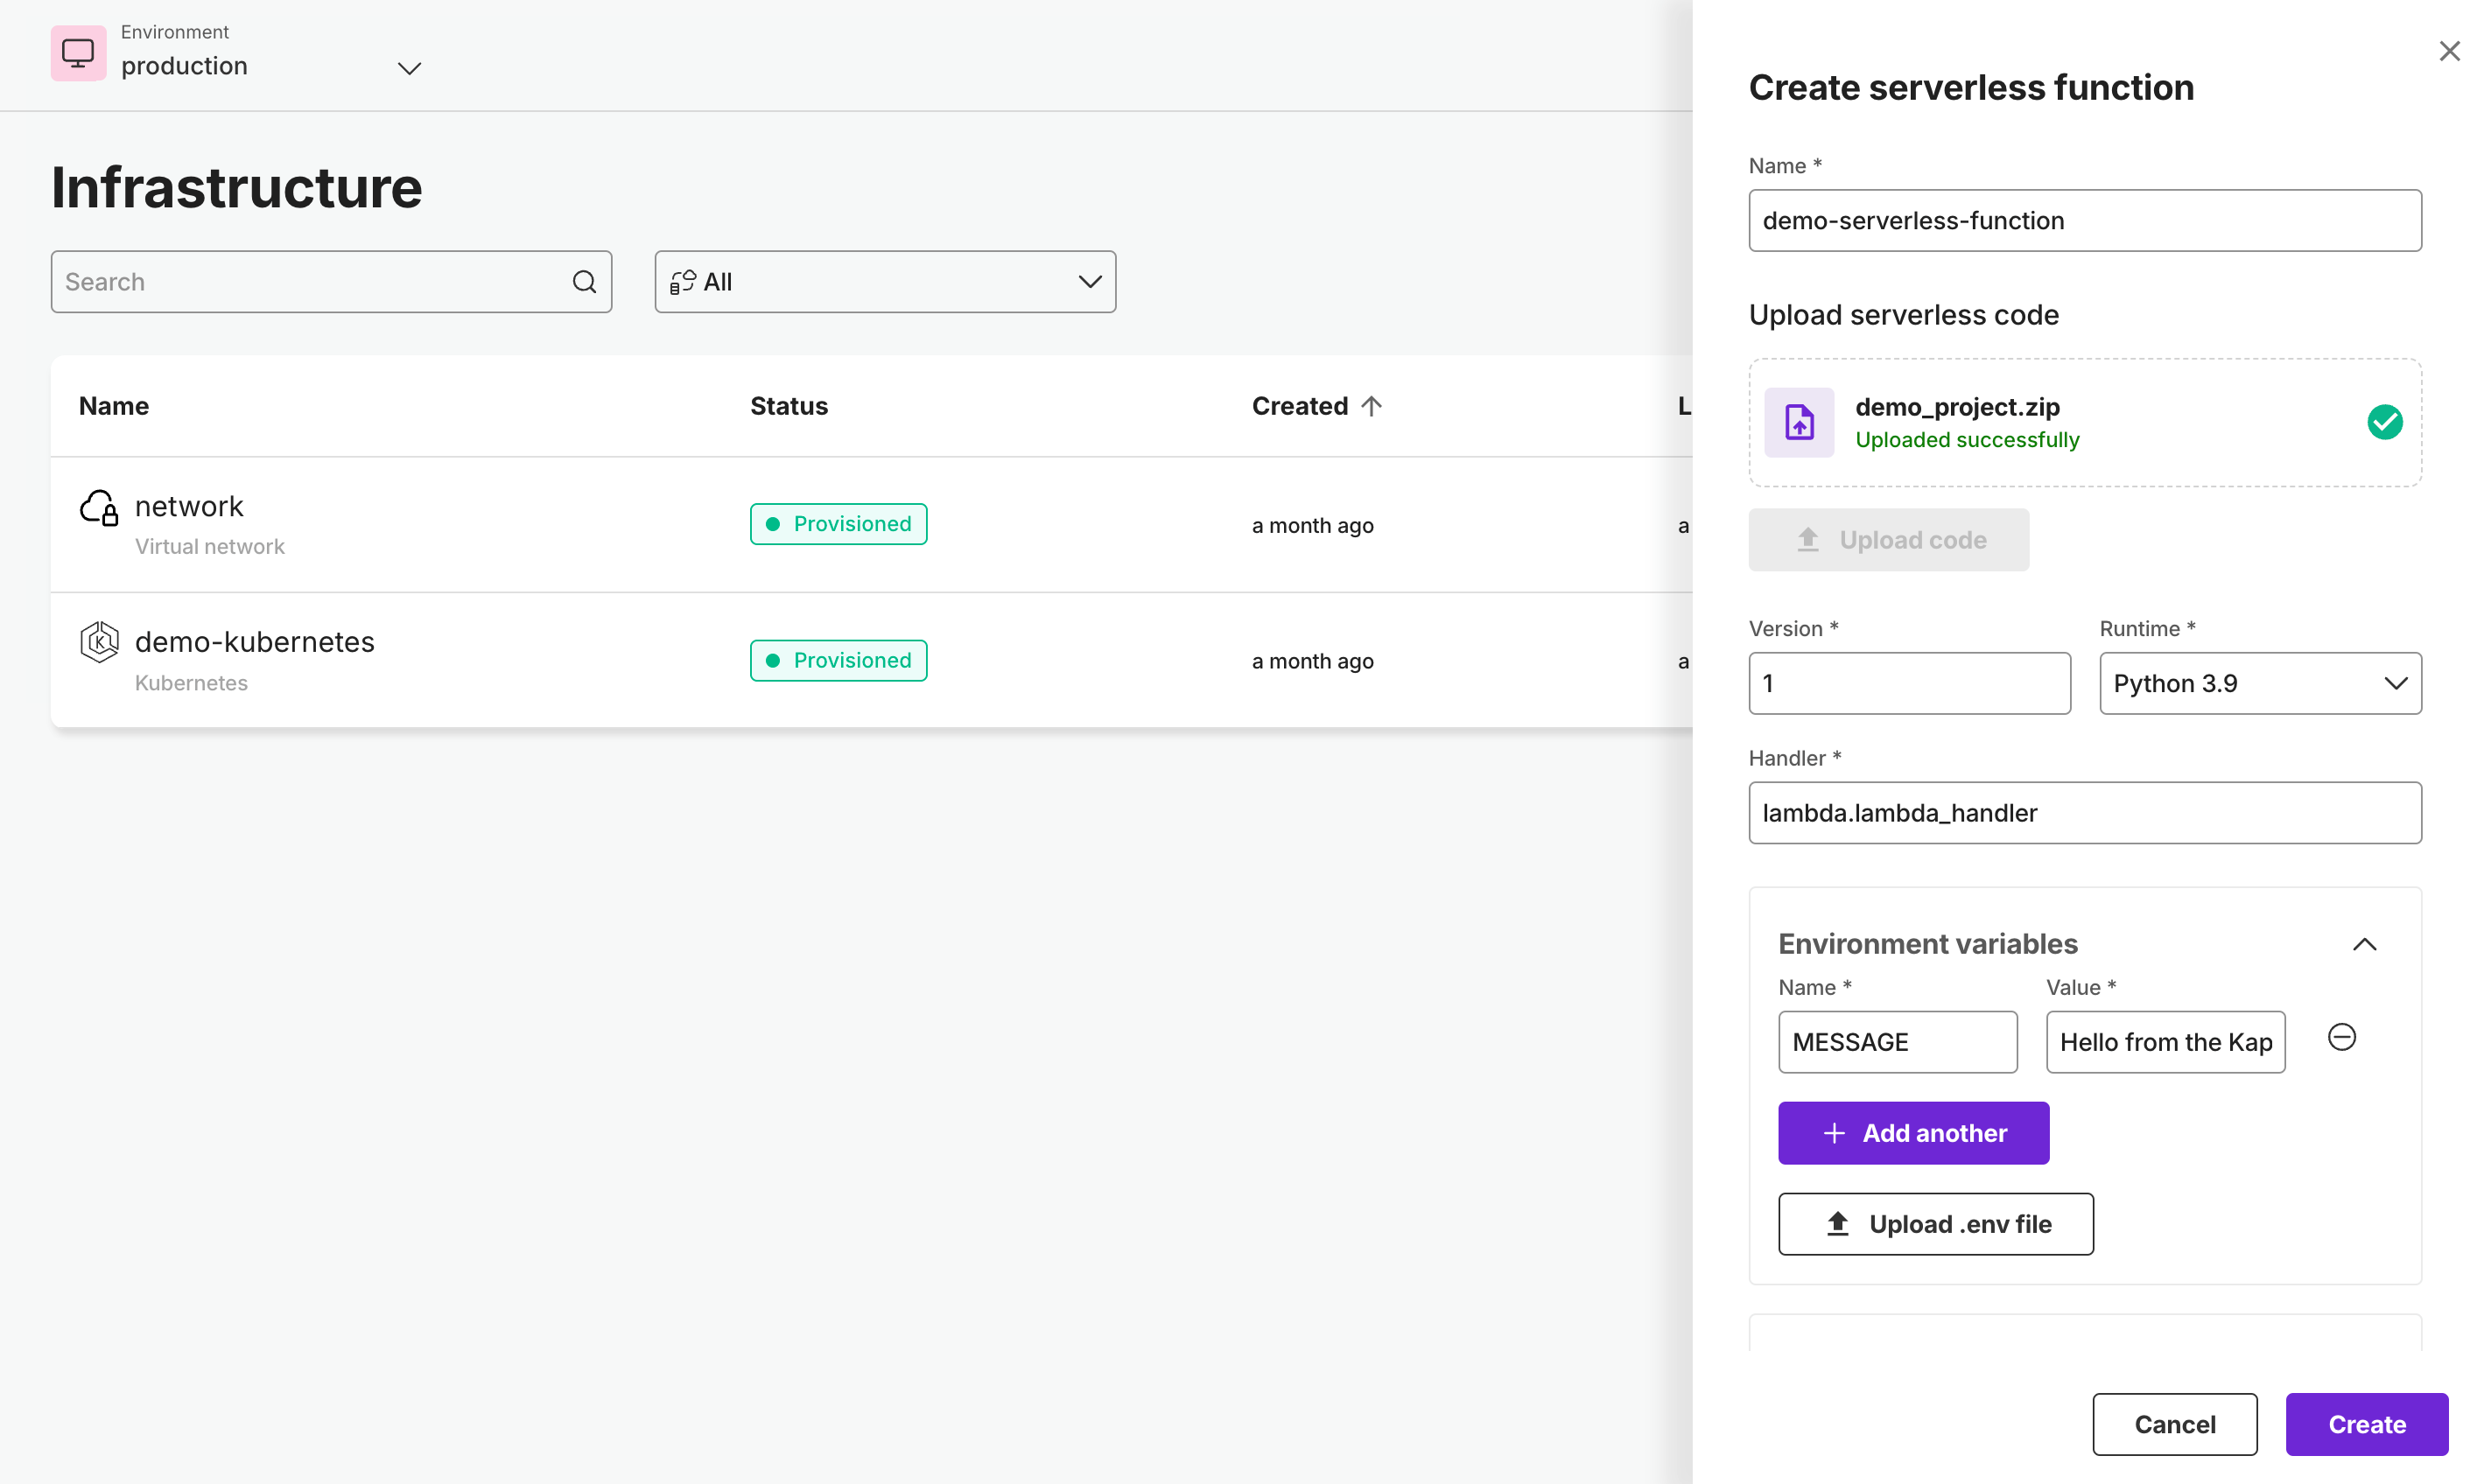
Basic Configuration
- Function Name: this is the name of your function, it must be unique within your environment.
- Serverless Code: this is the zip archive containing your code. You can upload it directly with the "Upload Code" button.
- Version: this is an arbitrary version that can be set to help track changes to your function.
- Runtime: this is the runtime that your function will be executed in, for this demo we will be using Python 3.9. You can see a list of all runtimes here
- Handler: this is the name of the function that will be executed when your function is invoked. It is in the format of "filename.function_name", for example we have configured this to call the "lambda_handler" function within the "lambda.py" file. For more information on how to configure handlers for Python see here
- Environment Variables: this is a list of name, value pairs that will be set as environment variables for your function. For this demo we will be setting the MESSAGE variable to "Hello from the Kapstan team!"
Advanced Configuration
Within the advanced configuration section you can configure a static URL to access you function, set authorization requirements, and connect virtual network access it to your existing resources.

Generating a static URL
If you would like your function to be accessible from a fixed URL you can select this option to automatically provision one. After enabling this, you are prompted to choose an Authorization Type to secure access to your function. There are two valid options for this, "None" and "AWS_IAM". "None" will allow anyone with the URL to access your function, while "AWS_IAM" will require authenticating with AWS in order to call the function. For this demo we will be using "None" to allow public access to our function.
Connecting to a Virtual Network
If your function requires access to other resources on your virtual network, you can use this section to connect them. You can select from a list of Virtual Networks within this environment, and then select the subnets you would like to give your function access to. For this demo we will be leaving this section blank.
Deploying your function
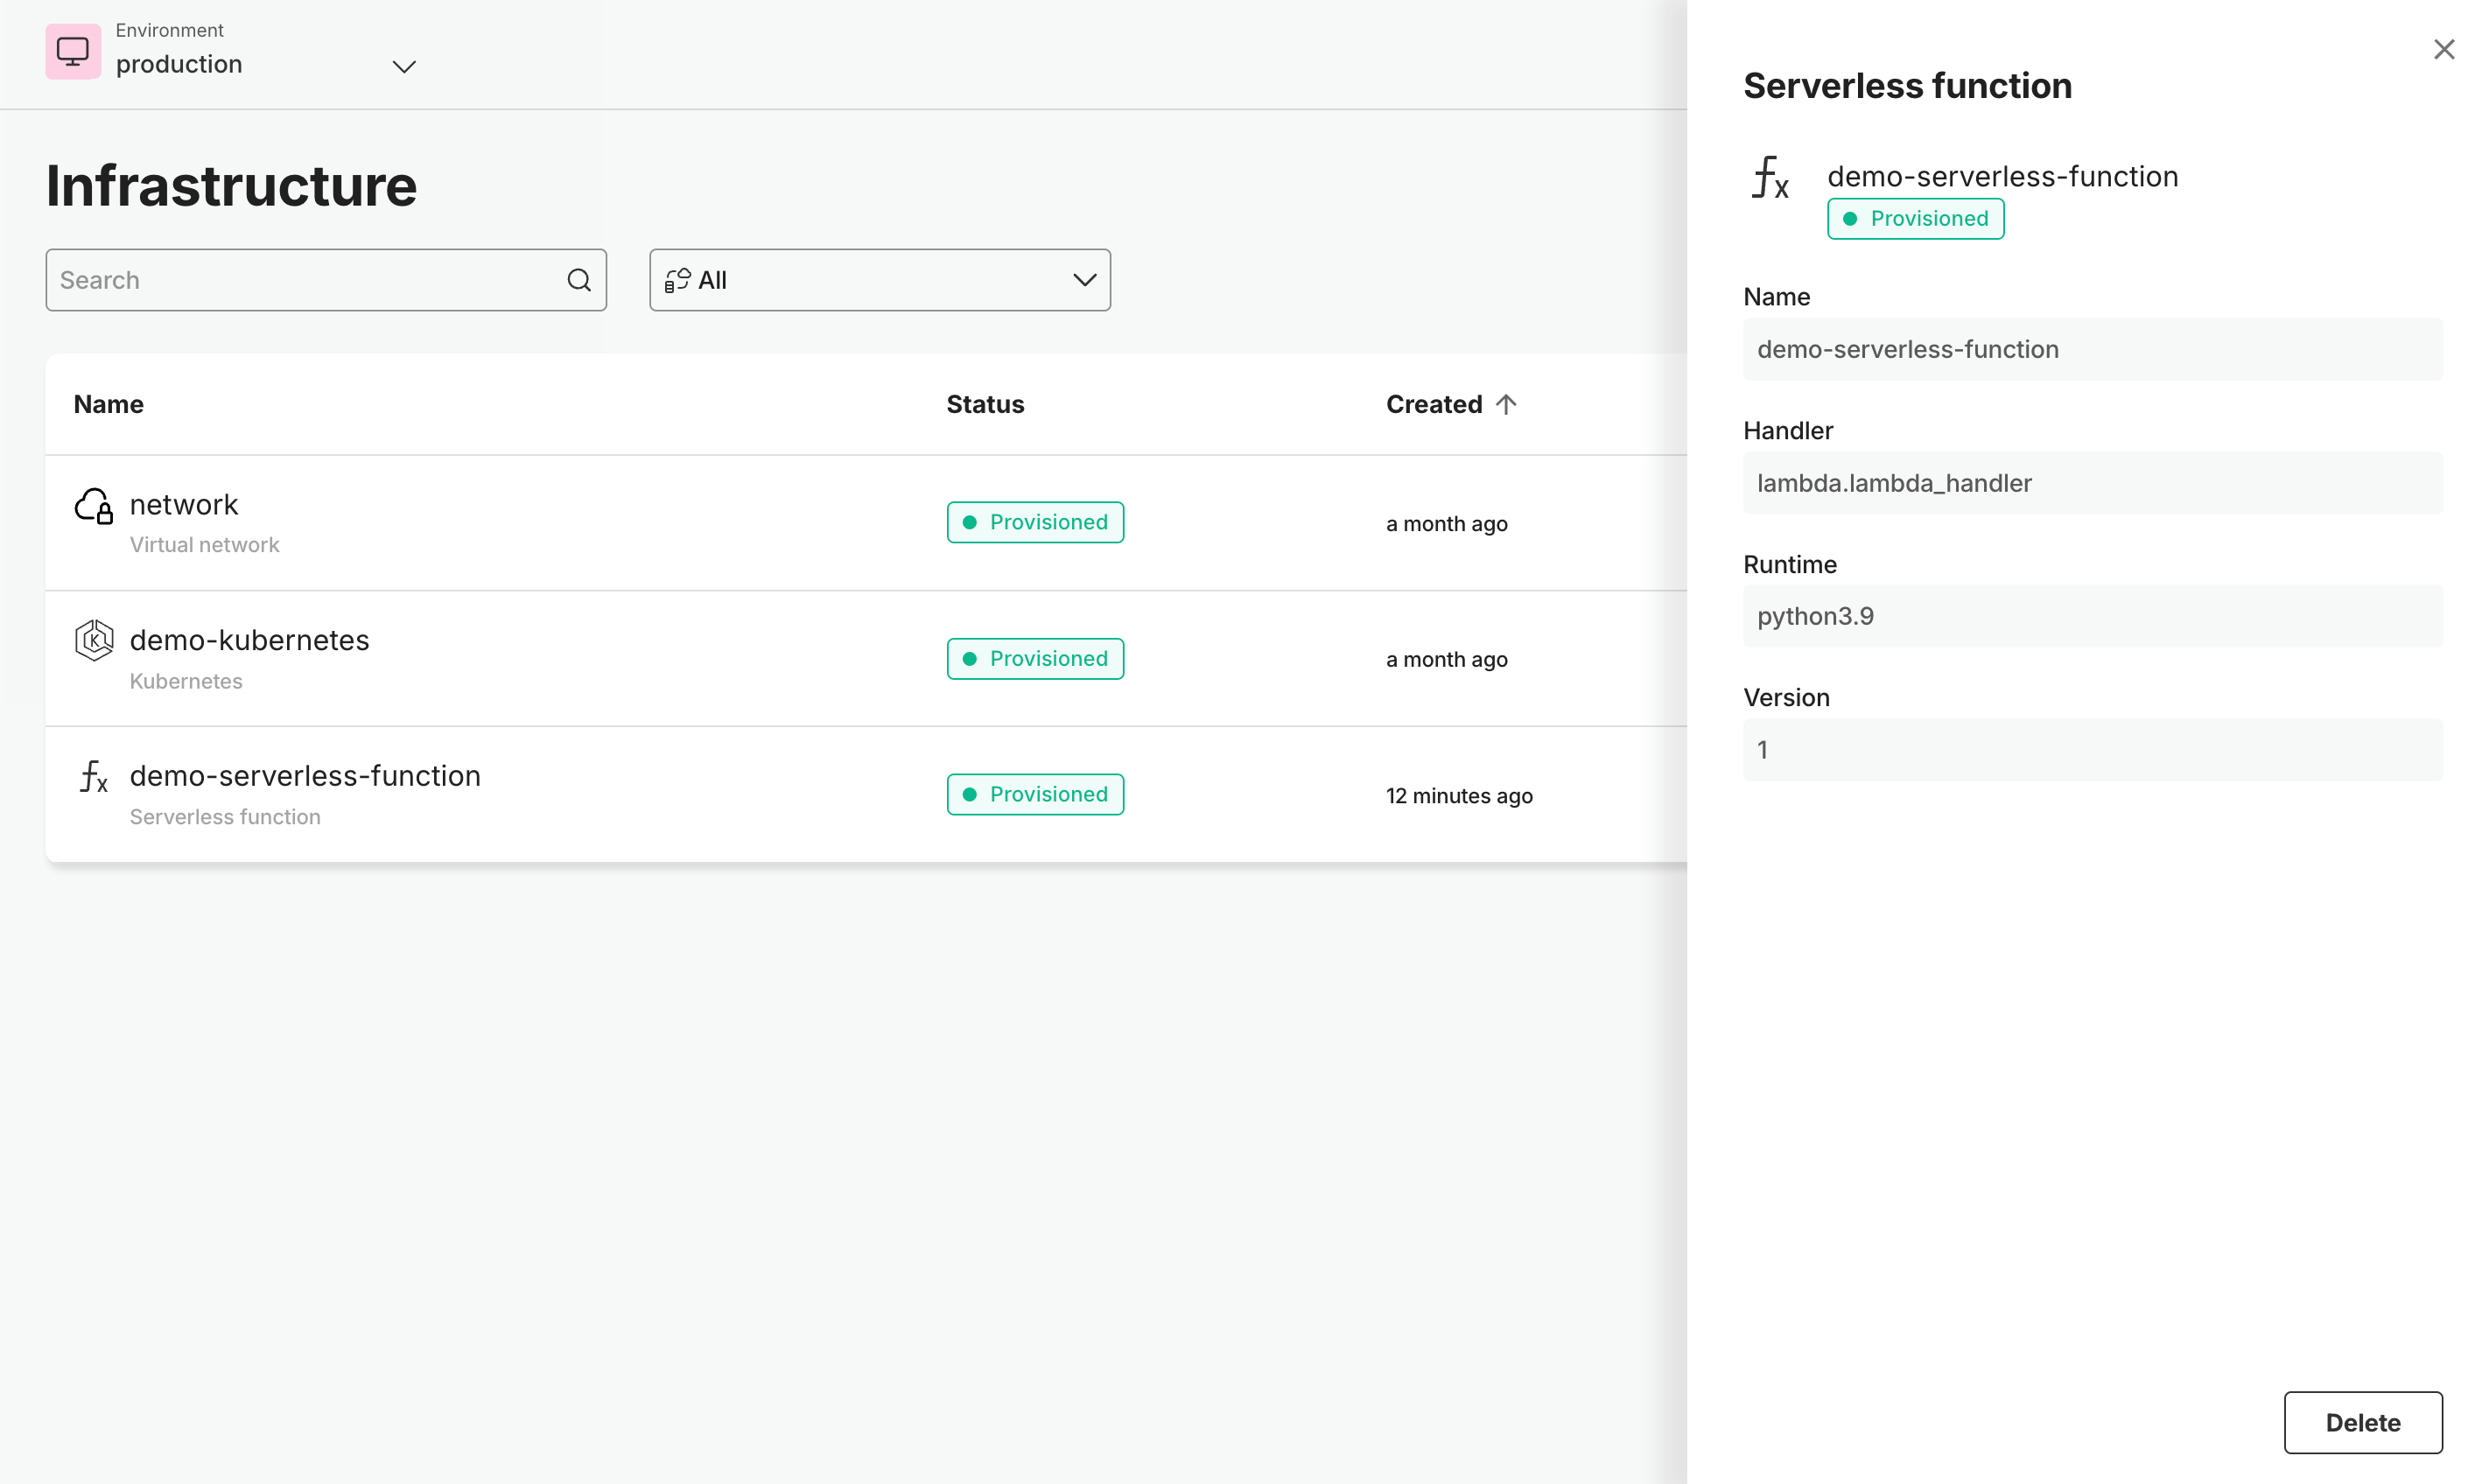
After you are done configuring your resource, click "Create" and watch your function be deployed! Once it is finished, you can click on the name of your function to see more details about it.
Since we chose to provision a static URL, we can view the function by selecting the "URL" attribute and entering it into our browser.
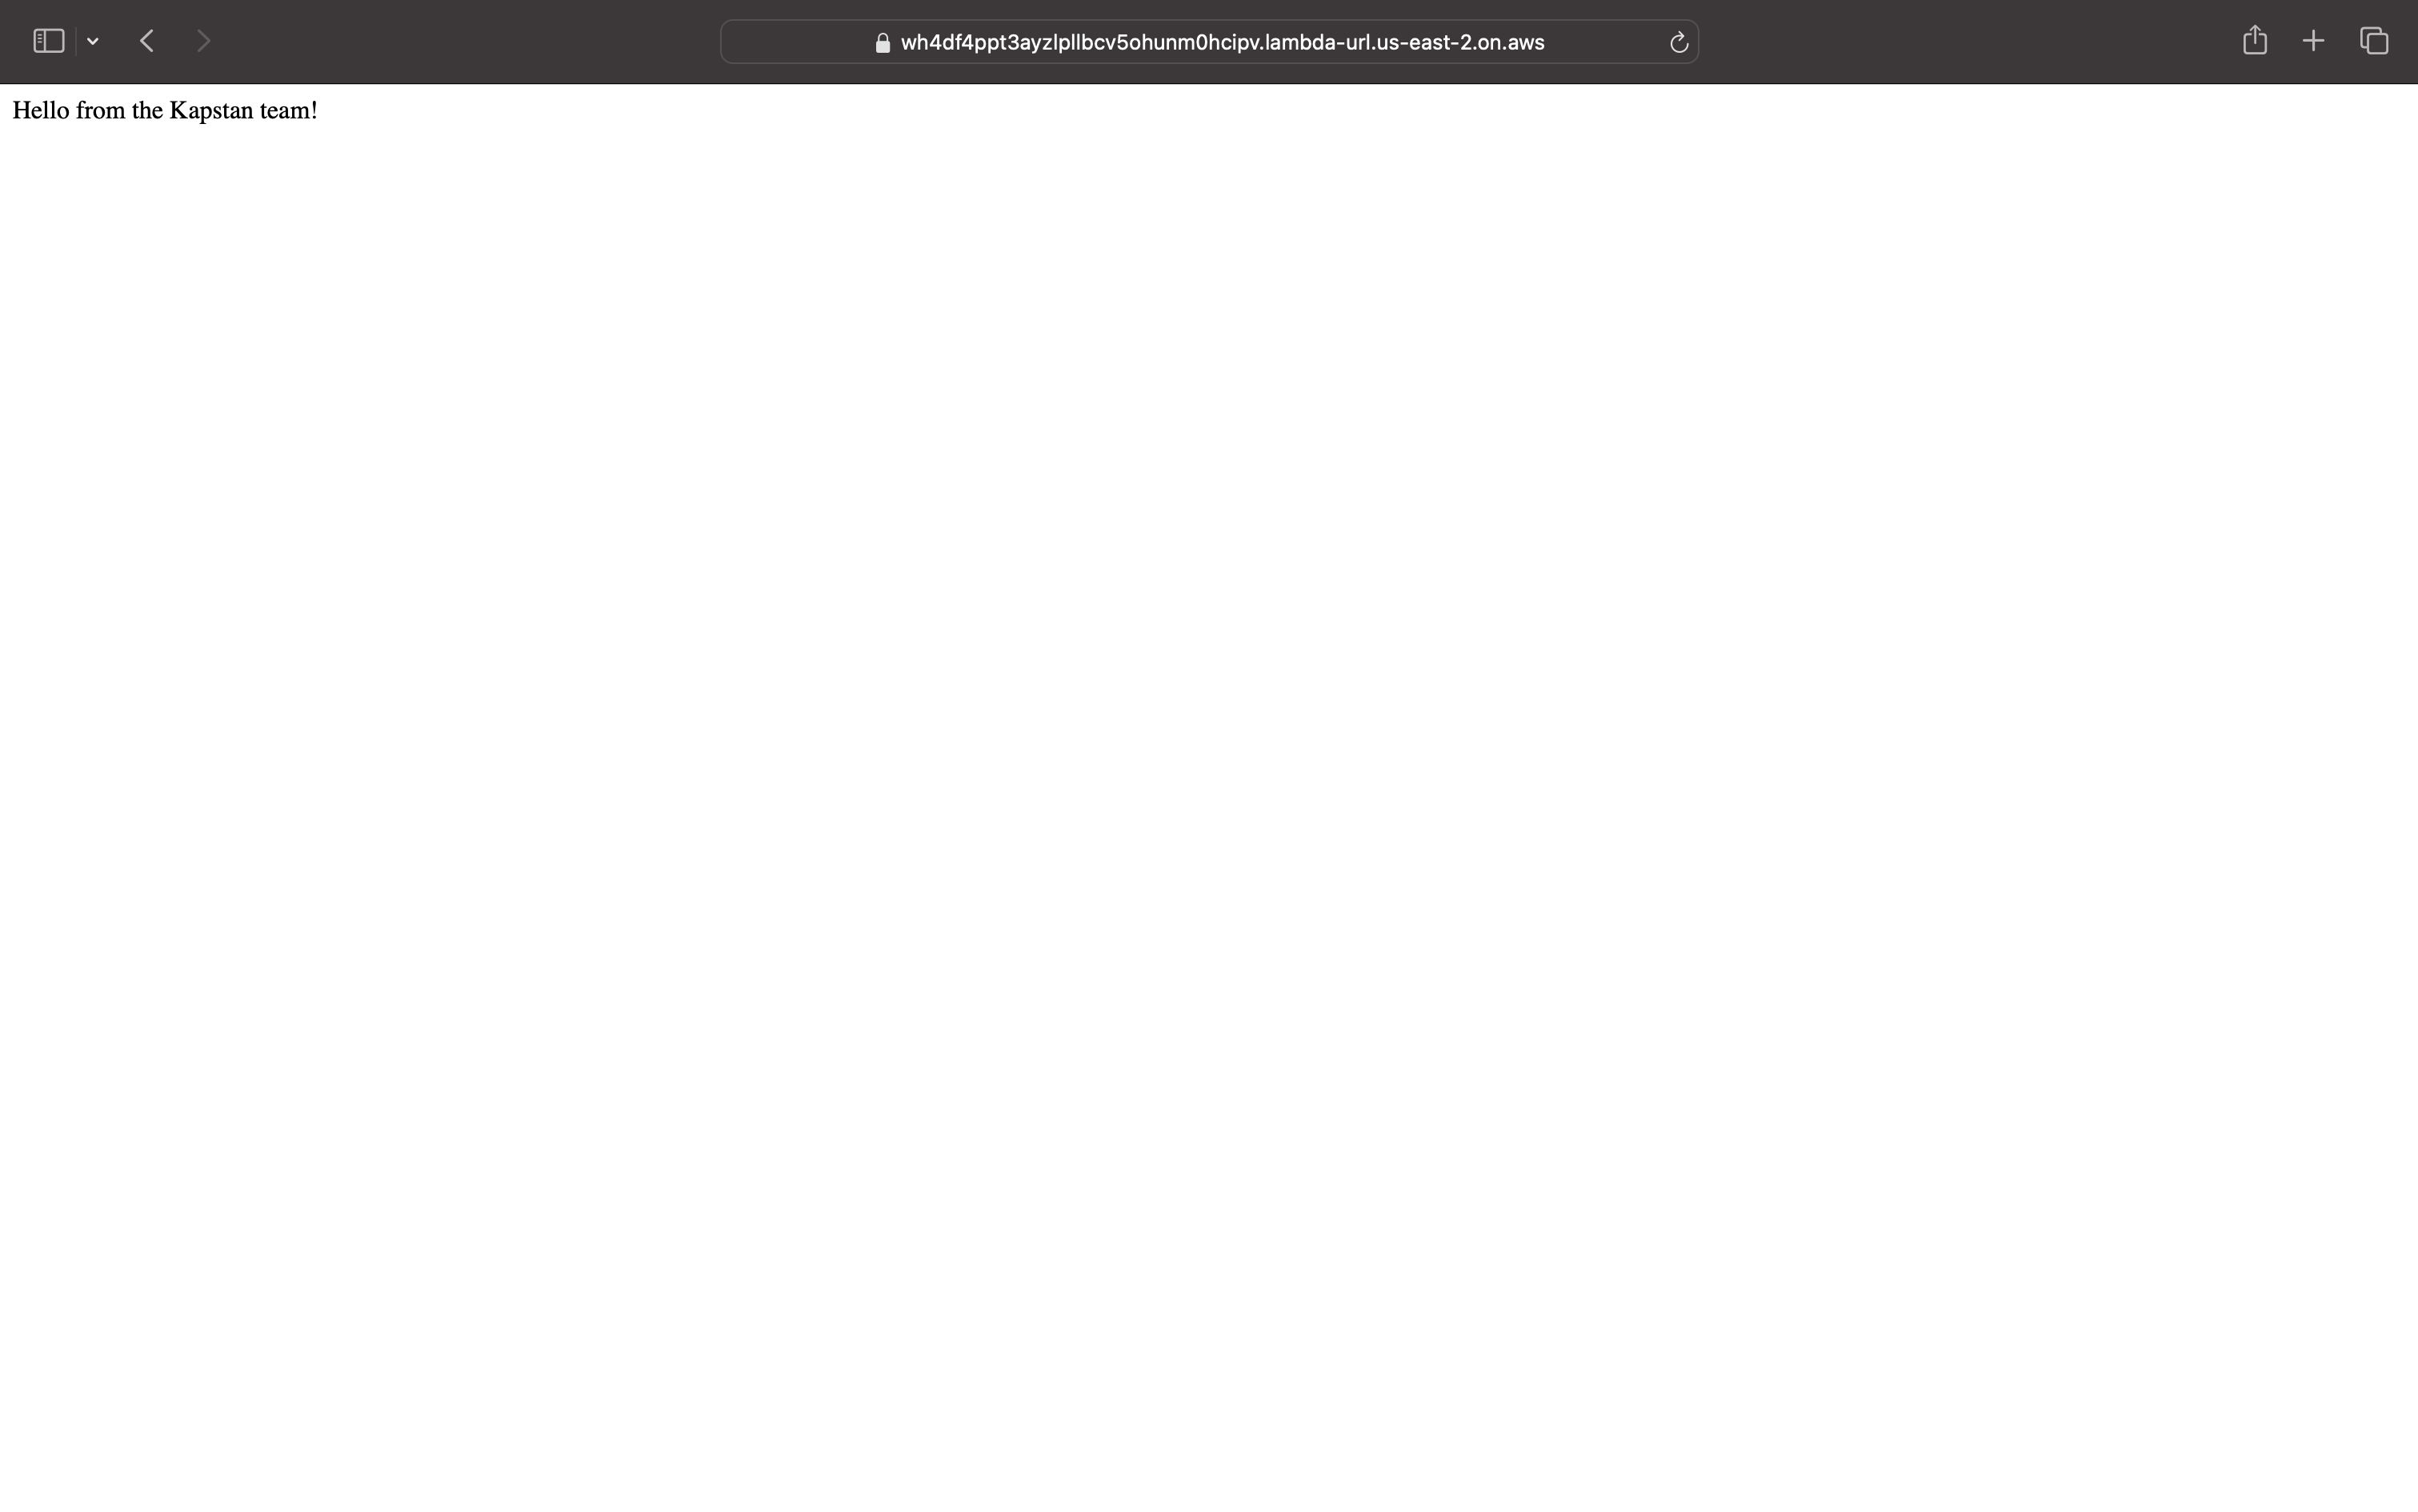 As you can see, our function is working as expected and returning the message we configured earlier.
