Environments
Kapstan environments represent a logical grouping of infrastructure and application. Environments in Kapstan serve as isolated environments that help you manage resources for different products or projects. Resources can't be shared across environments. For instance, if you oversee two distinct products, you can create individual environments for each to ensure a clean separation of resources. Environments are also useful for segregating different operational environments like development and production.
There is no limit on number of environments in Kapstan.
Getting Started with Environments
When you sign up for Kapstan, the platform will prompt you to set up an environment as your first step. Before you can do that, you'll need to establish a connection with a cloud provider. Here's how to get started:
- Establish a Cloud Provider Connection: Follow these instructions to set up a connection with your cloud provider.
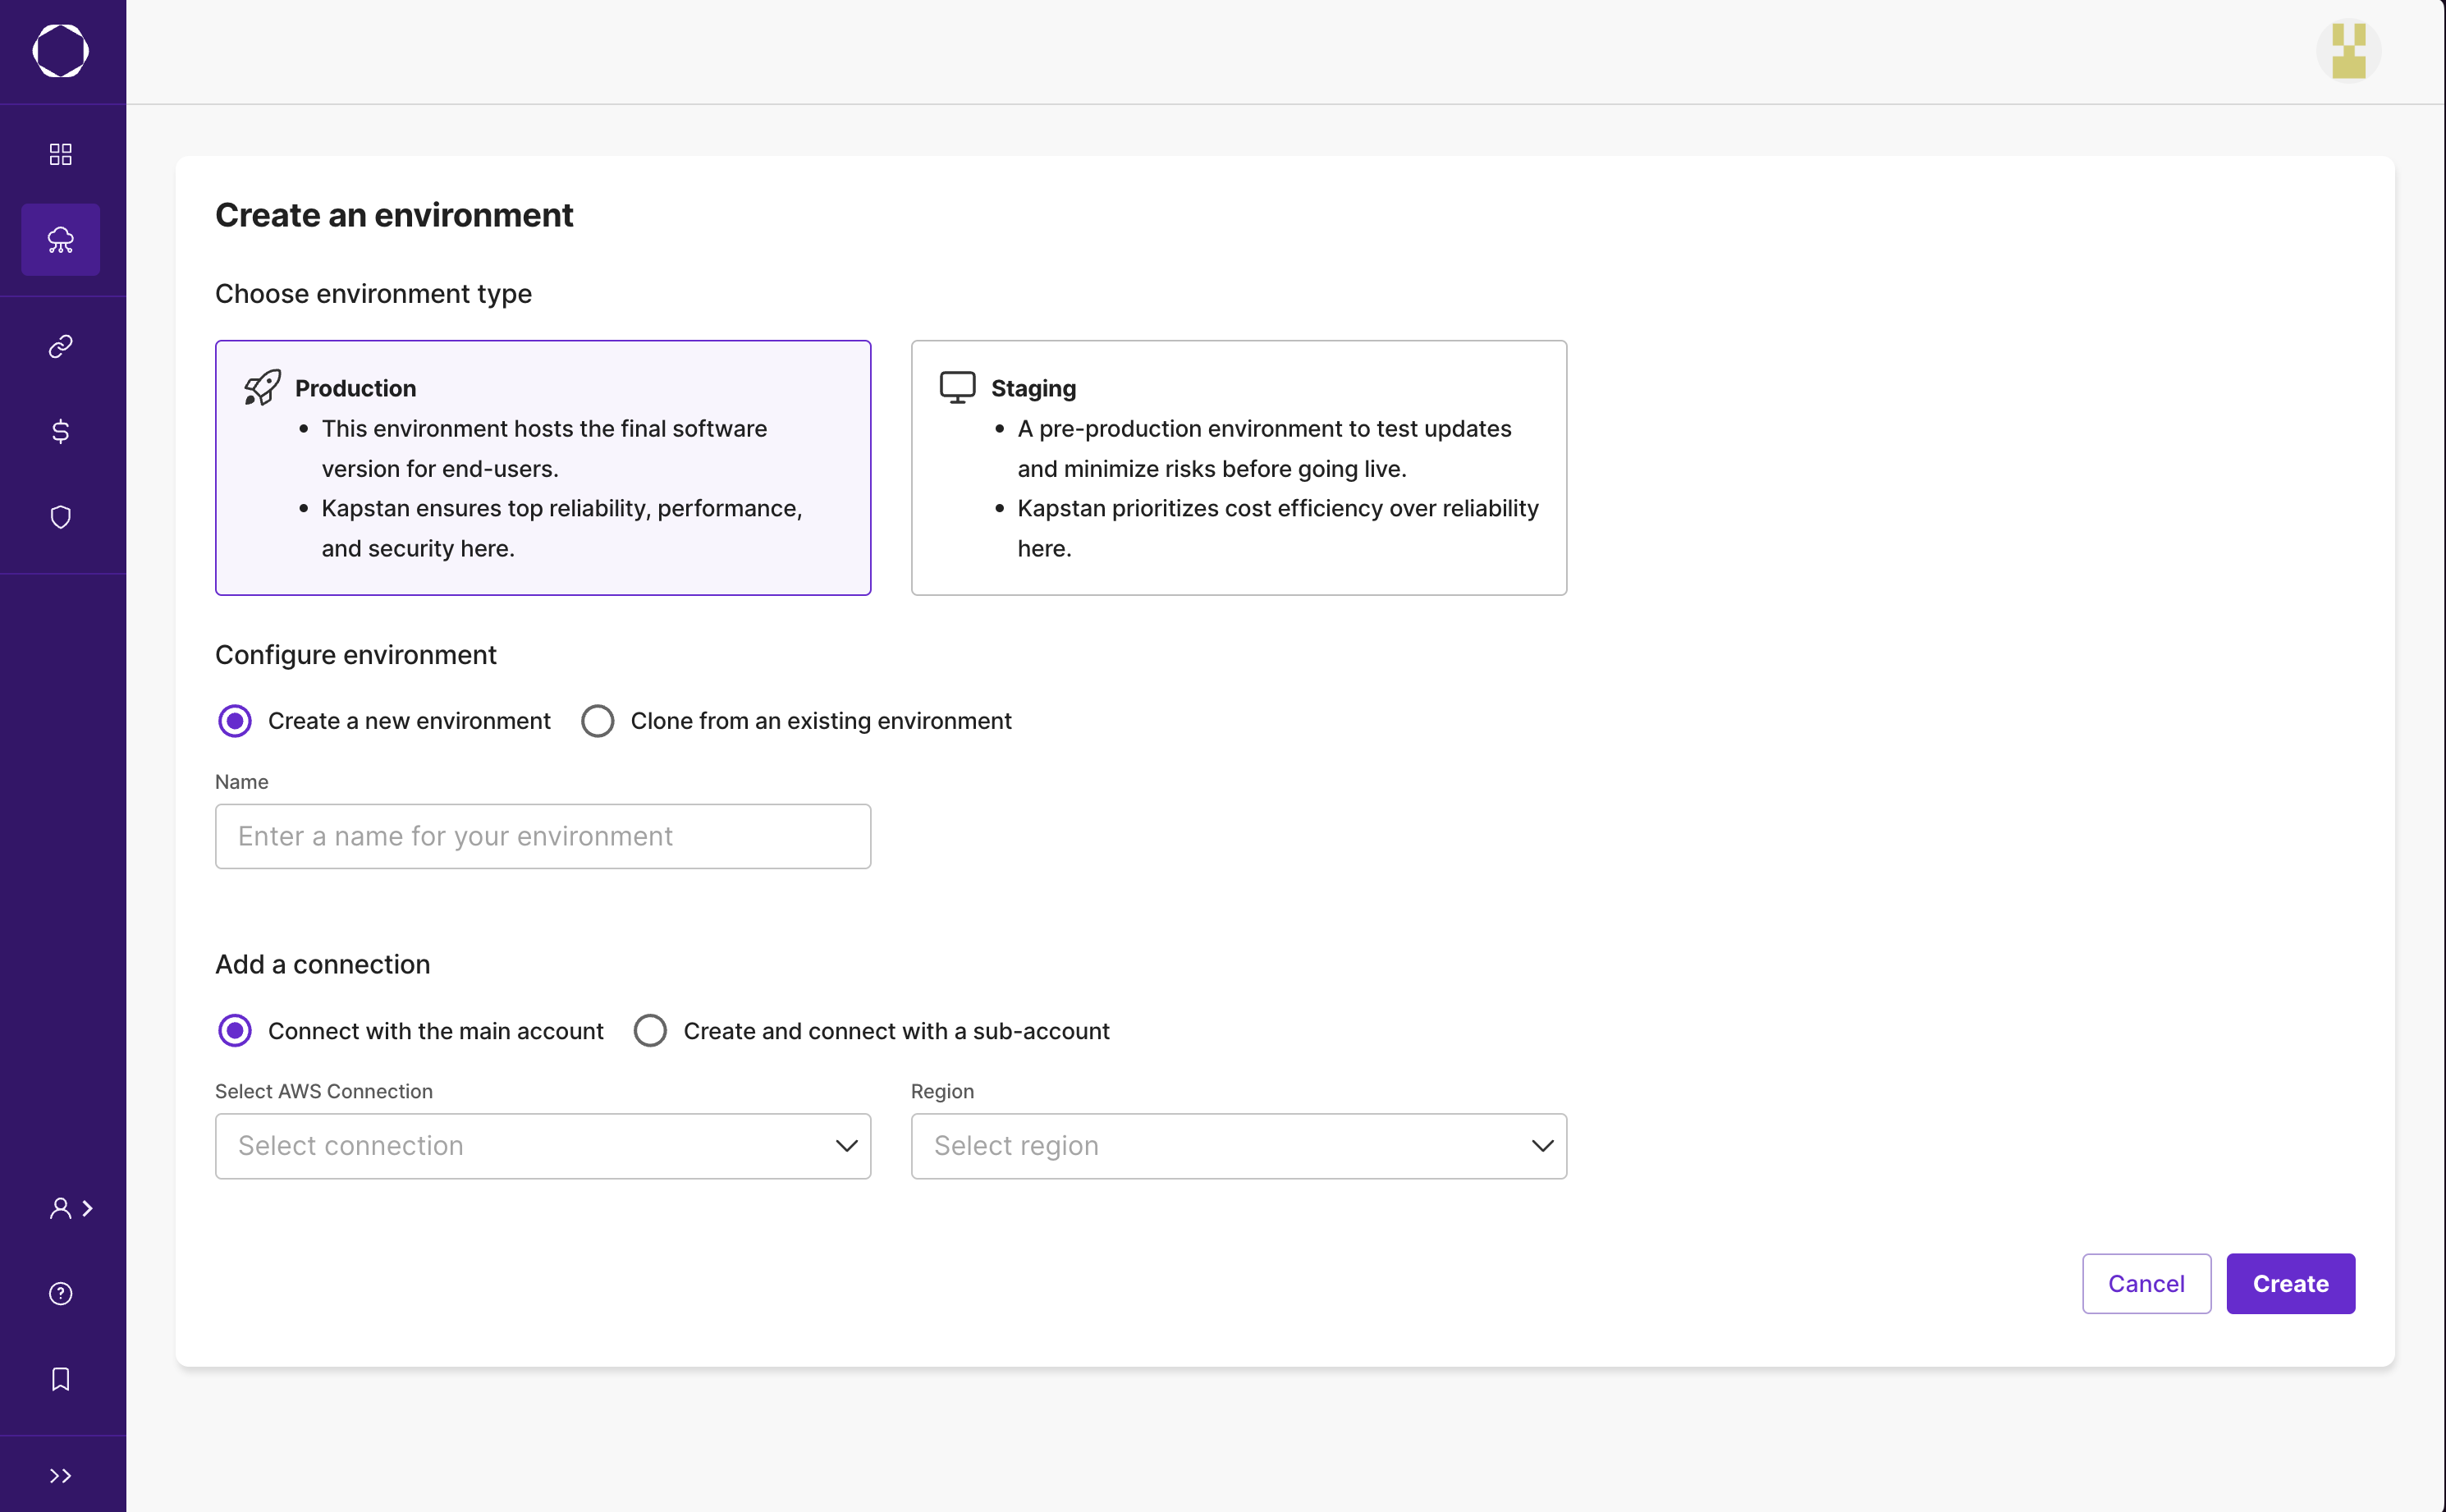
- Create a new Environment. Click here to create a new environment. You will need to provide following information
- Environment Type: Choose between Staging or Production type. Kapstan provisioned staging environments are optimized for cost, while production environments are optimized for reliability and performance. Read more about Environment Types.
- Environment Name: Give a unique and meaningful name; e.g. Development, Production.
- AWS Connection: Choose the cloud provider connection you've set up.
- Region: Select the geographical region for your deployment.
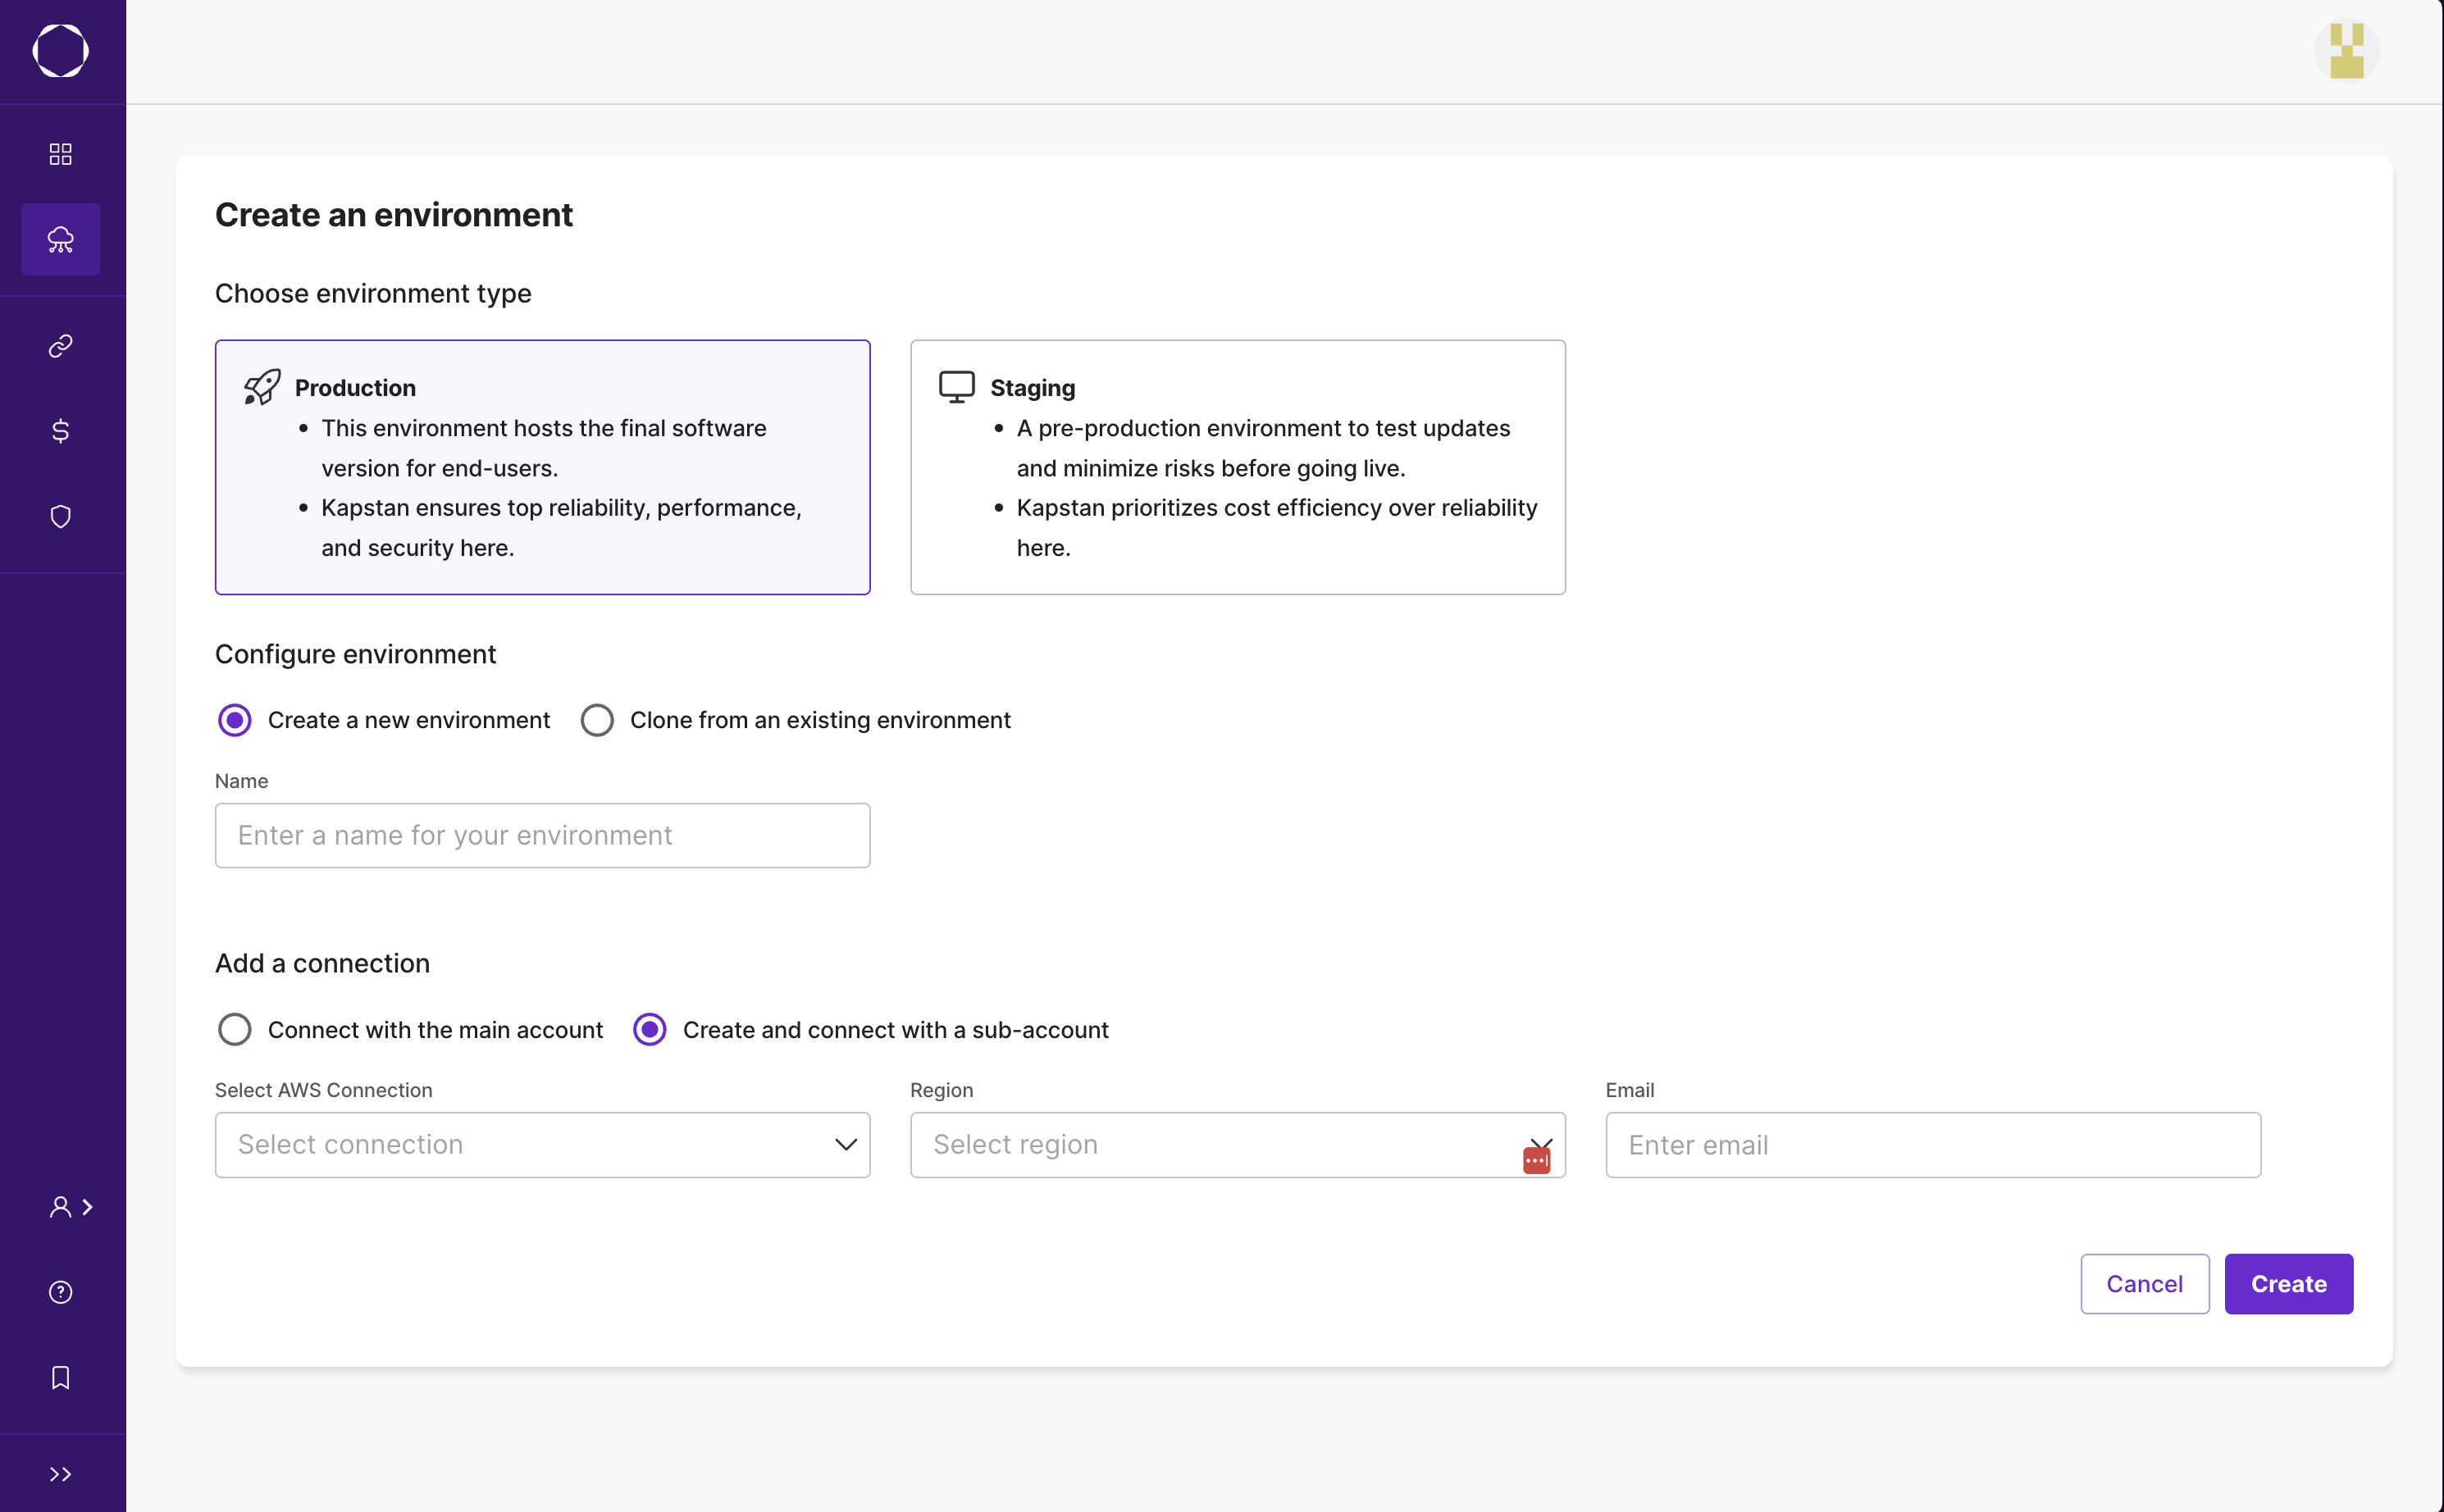
- Account Type: Decide if you want to deploy resources in the main connected account or create a sub-account. If you opt for a sub-account, you'll need to specify an email address for the sub-account owner.
Main Account
Sub-Account
Once you provide the above information, click on Create to create the new environment.
Visual Identification
 Every environment in Kapstan has its own unique color for easy identification, especially if you are managing multiple environments in different tabs.
