Kubernetes Cluster
The "Kubernetes Cluster" simplifies the deployment of the Kubernetes control plane and node groups; by providing essential configurations out of the box. In the following section, we'll explore the process of creating a Kubernetes cluster using Kapstan.
Pre-requisites
Before you proceed, ensure you have a virtual network set up in Kapstan. If not, please follow the steps in our Virtual Network Documentation.
Steps to Create a Kubernetes Cluster
You can only have one kubernetes cluster provisioned per environment at a time.
- Navigate to the Infrastructure Overview on Kapstan.
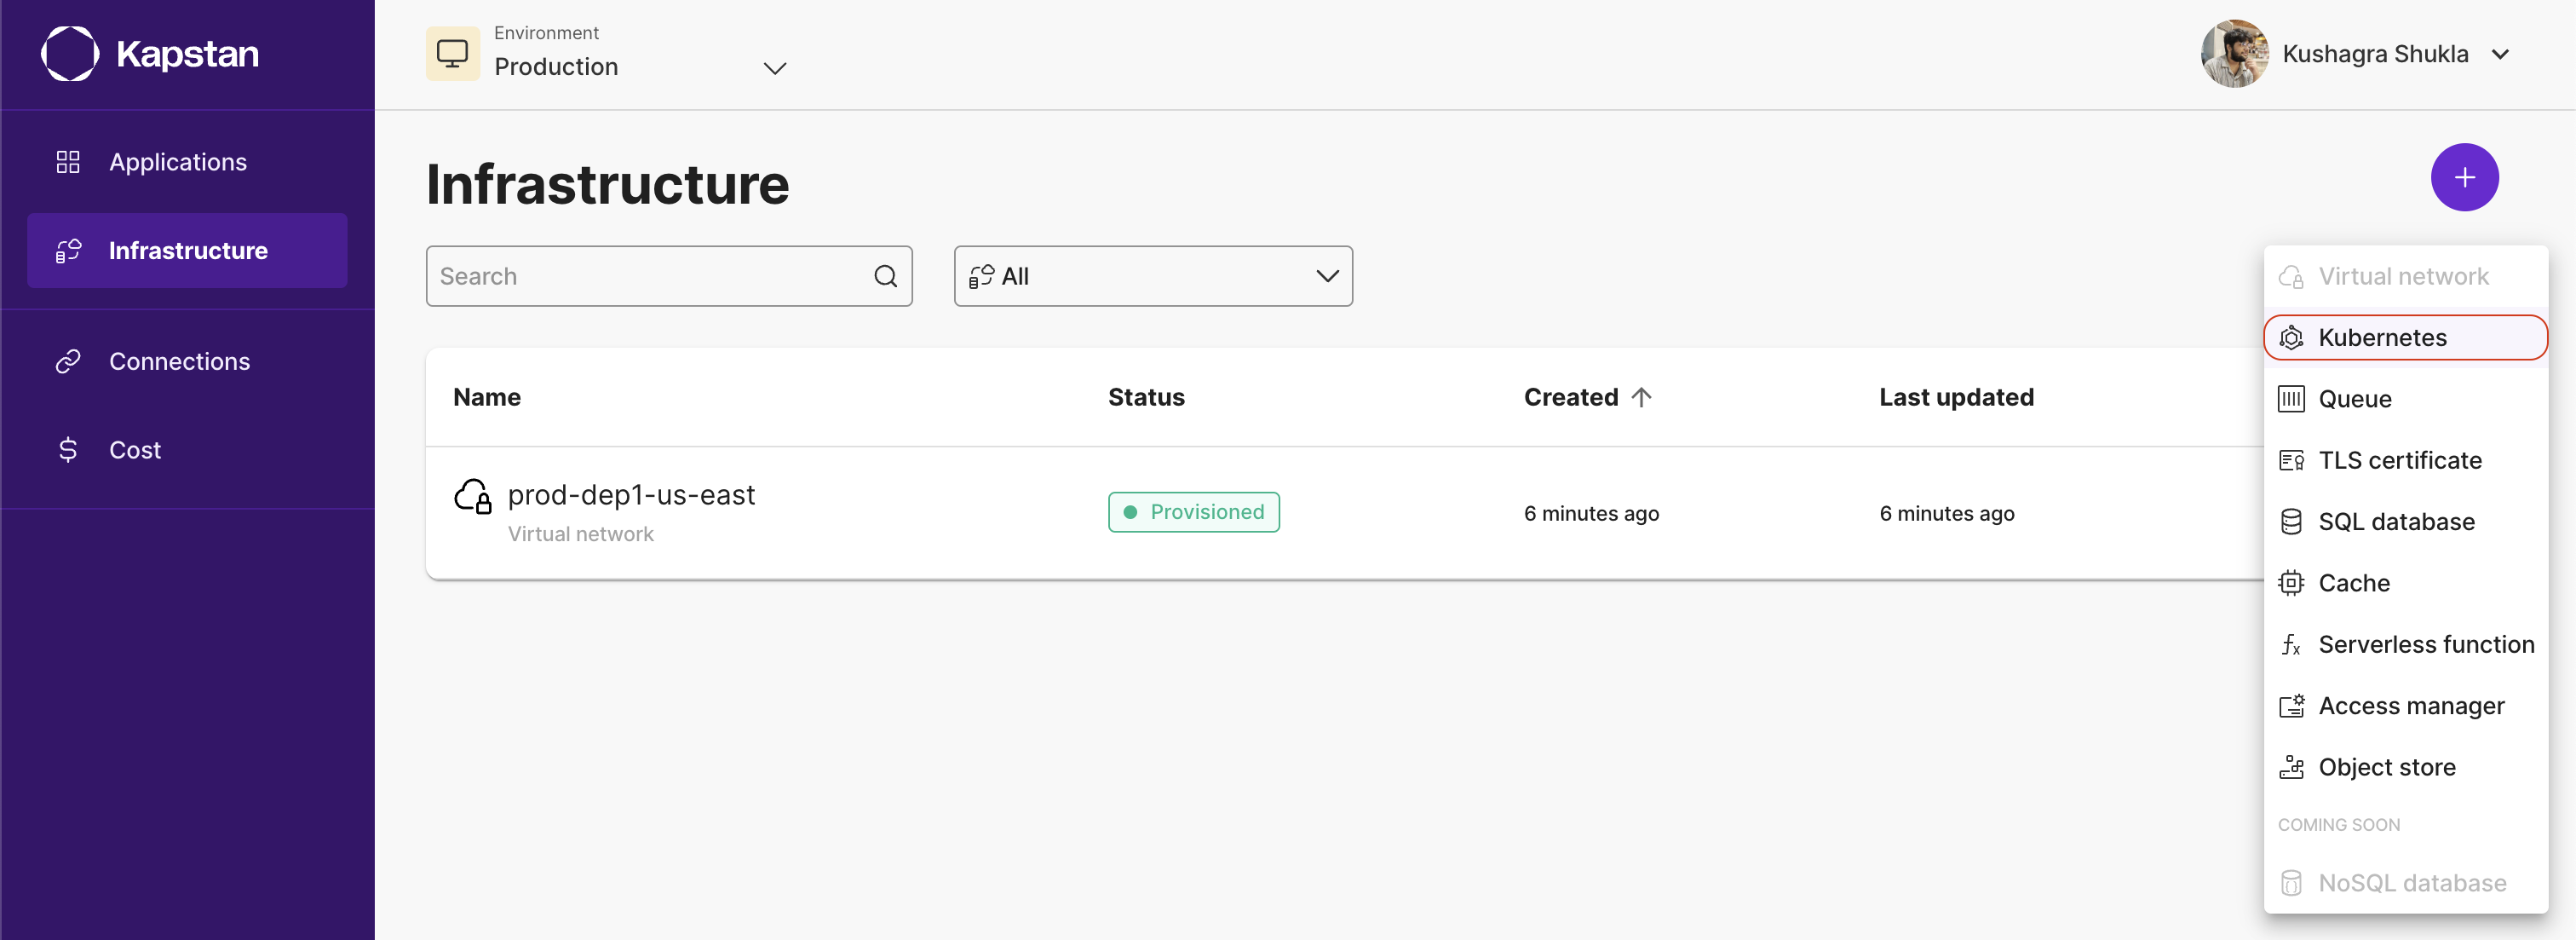
- Click on the "+" icon and then on "Kubernetes".
- Alternatively, you can also click here to create a new Kubernetes Cluster. It will create a new Kubernetes Cluster in your selected environment.

Configuration
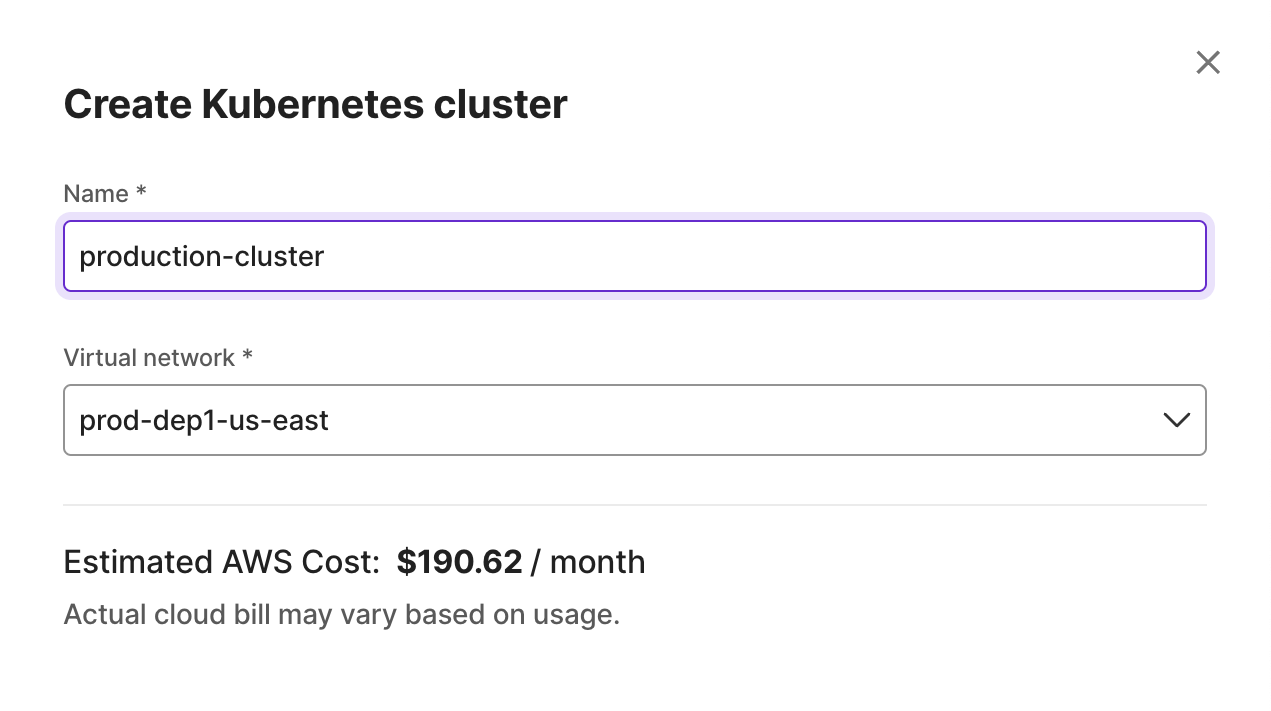
- Name: Enter a unique name for your cluster. This will be used to identify your cluster within the Kapstan interface. E.g., prod_user_cluster.
- Virtual network: From the dropdown menu, select the Virtual Network in which you want your cluster to reside. Read more about creating Virtual Network here.

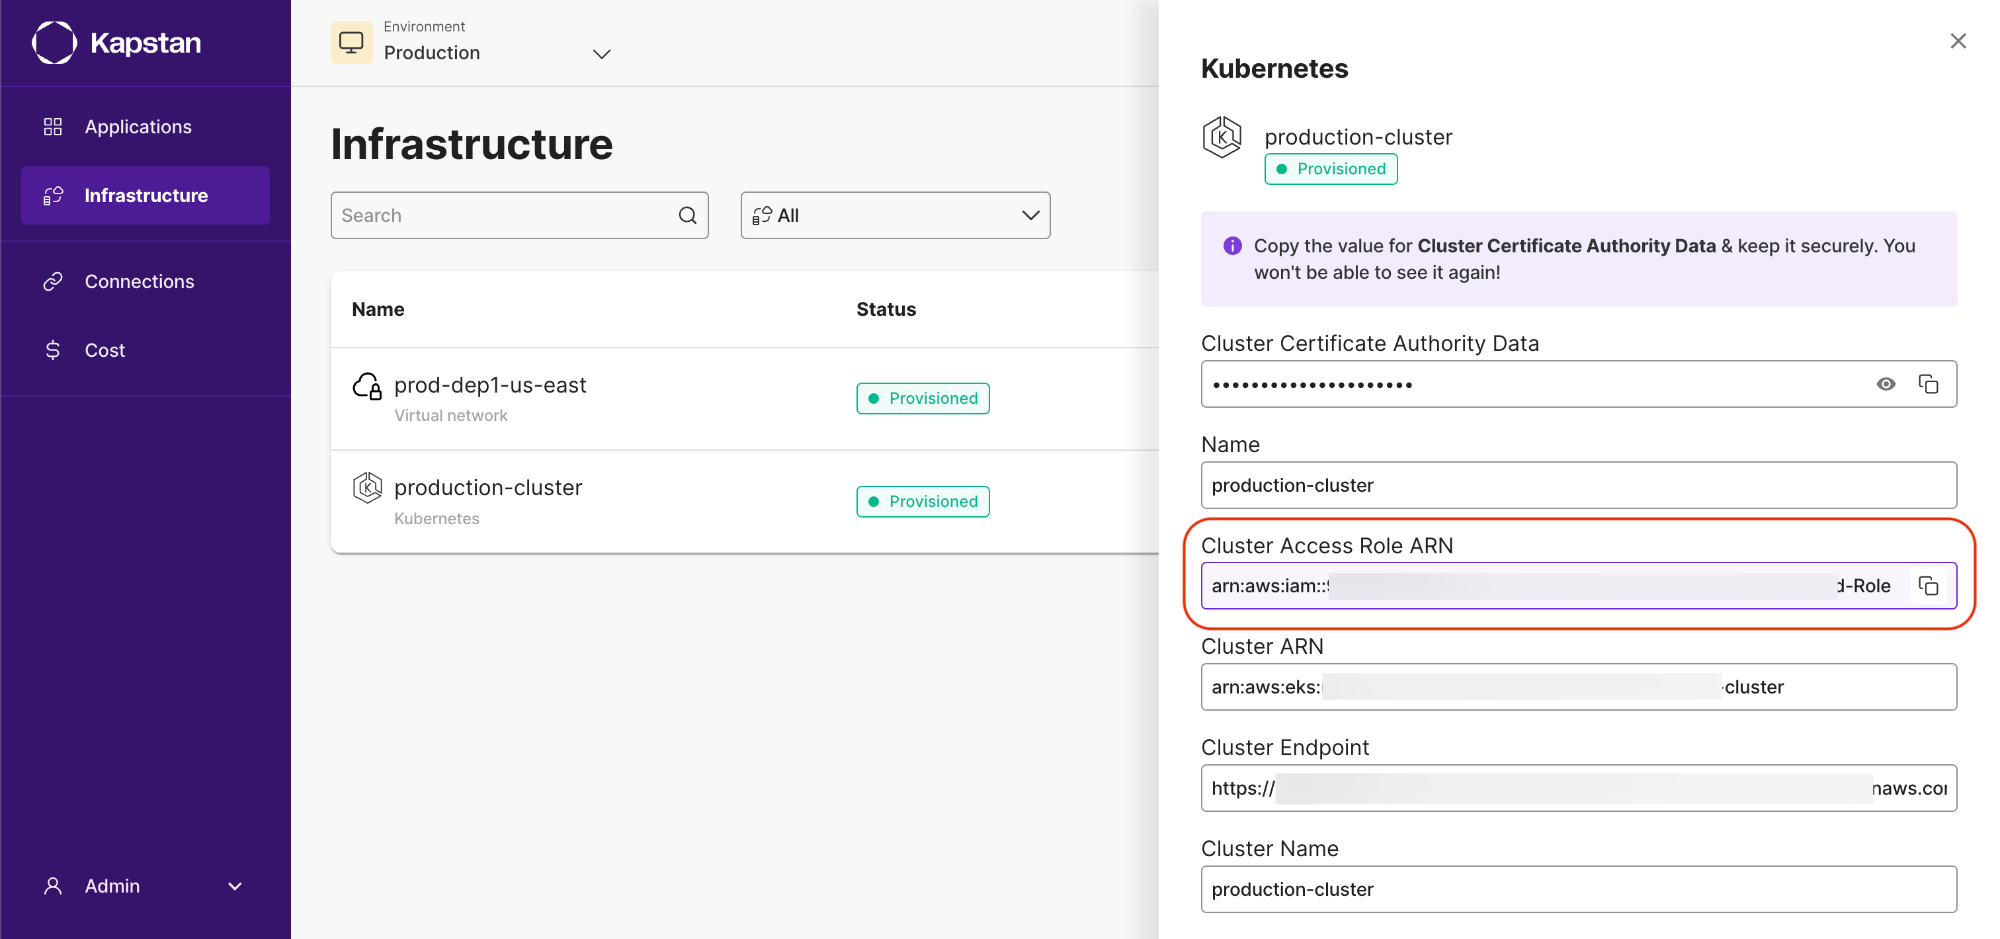
The setup process typically completes within just a few minutes. To monitor the status of your Kubernetes Cluster, please visit the Infrastructure Overview.
Behind the Scenes
When you create a Kubernetes Cluster through Kapstan, the platform automatically configures AWS EKS (Elastic Kubernetes Service) cluster along with its associated resources, IAM roles, and configurations, and tags relevant AWS resources for seamless operation and integration. It also ensures proper authentication and security measures for the cluster's nodes and associated services.
Steps to connect to Kubernetes cluster using kubectl
Kubernetes provides a command line tool, kubectl, for communicating with a Kubernetes cluster's control plane, using the Kubernetes API.
- Ensure you AWS Command Line Interface configured in your environment.
- Copy the cluster ARN from Kapstan UI

- Create or update the kubeconfig file for your cluster by running the following command on your terminal and copy the generated context:
aws eks --region <aws region> update-kubeconfig --name <cluster name in Kapstan> --role-arn <cluster's ARN>
- Run:
kubectl config use-context <generated context from previous command>
- Run the following to list the details and also check if the setup is correct:
kubectl get all
