Cache
Set up a distributed cache easily and securely with Kapstan. This guide walks you through the steps for configuring your own cache server in a Kapstan managed environment.
Before you proceed, ensure you have a virtual network set up in your environment. If not, please follow the steps to setup Virtual Network.
Steps to Create Cache
- Navigate to the Infrastructure Overview on the Kapstan.
- Click on "Create" and then on "Cache".
- Alternatively, you can also click here to create a new cache server. It will create a new cache server in your selected environment.
Configuration
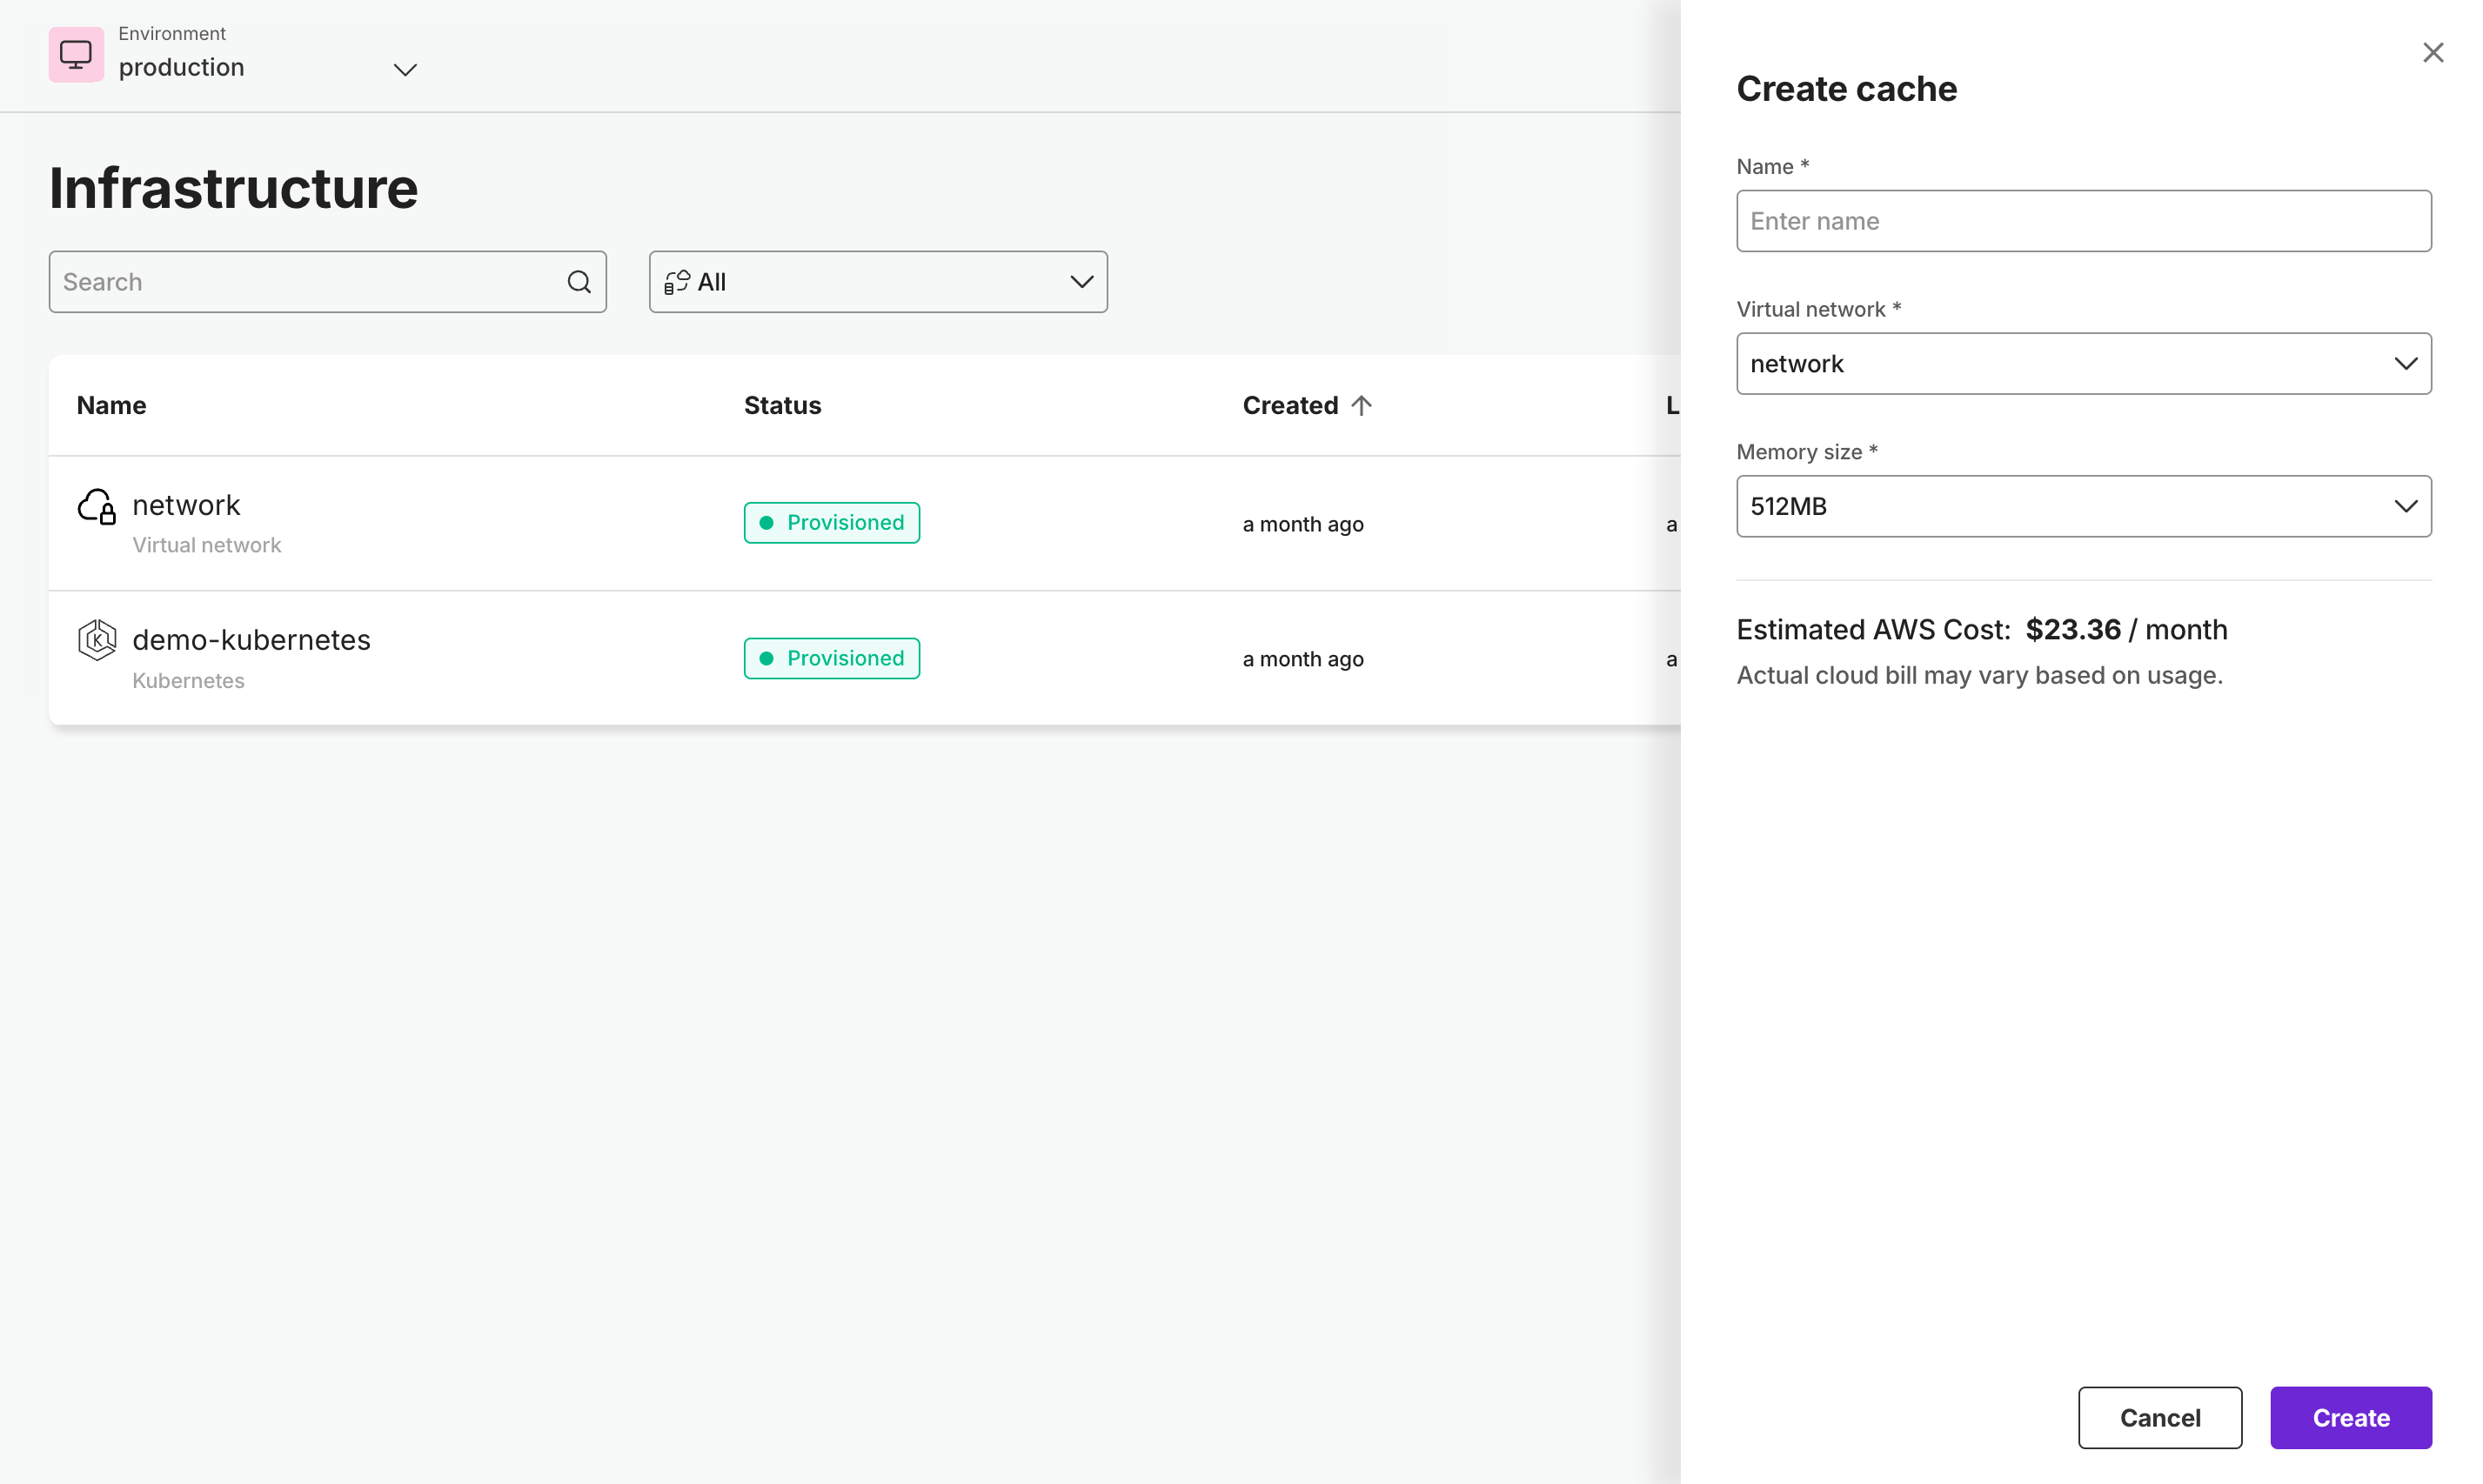
Complete the creation process by providing the required values in the form.
- Cache Name: Enter a unique name for your cache.
- Virtual Network: Choose the appropriate Virtual Network in which your cache server will reside. This must be set up beforehand. More details here.
- Memory Size: Specify the memory required for cache.

The setup process typically completes within just a few minutes. To monitor the status of your Cache, please visit the Infrastructure Overview section. Read about Infrastructure Overview here.
Behind the Scenes
When you create a cache server through Kapstan, the platform automatically configures Elasticache Redis with essential settings such as security groups, parameter groups, and logging features to make your cache server operational and secure.
